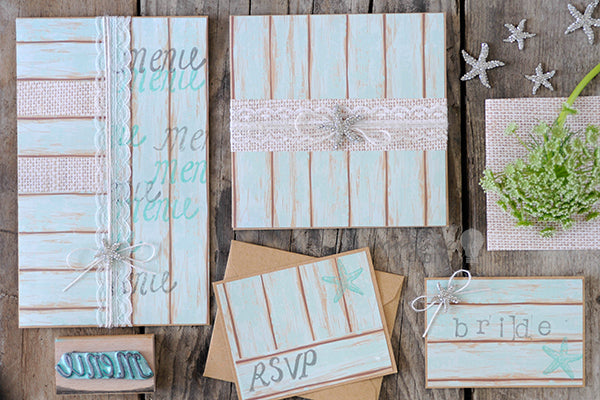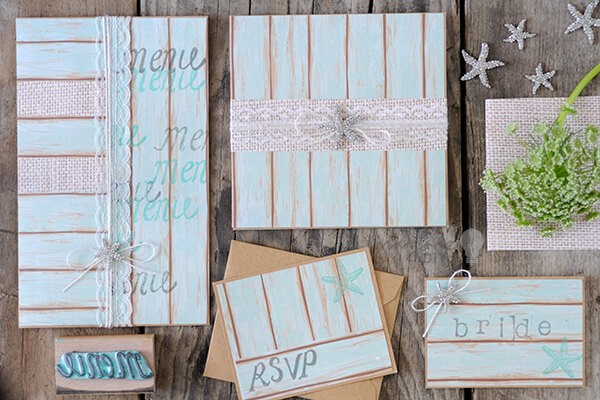
Beach Theme Wedding Invitations
Our guide on how to make beach theme wedding invitations makes it a really easy and fun range to make yourself. For beach lovers or brides planning a beach theme or destination wedding, this range is just perfect. It manages to combine textures and prints to create a really natural but striking looking range. So why not give it a go?

Here’s How To Make This Gorgeous Beach Theme Wedding Invitation:
For each invitation you will need:
1 sheet of Kraft Card. (click here)
1/2 sheet of Kraft Paper. (click here)
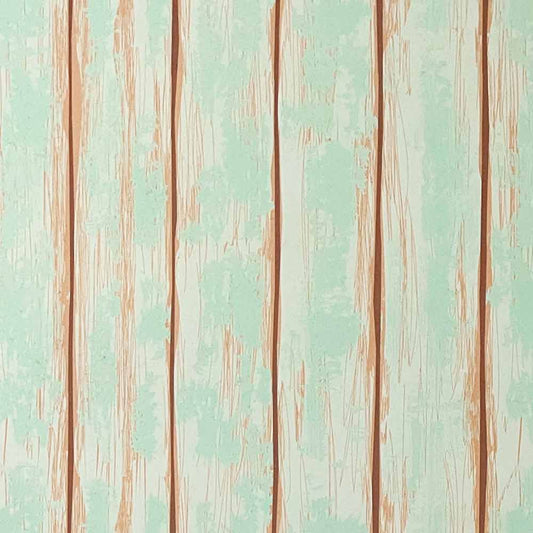
1/2 sheet of Driftwood paper in aqua. (click here)
16cm scalloped lace. (click here)
30cm Natural Hemp Cord. (click here)
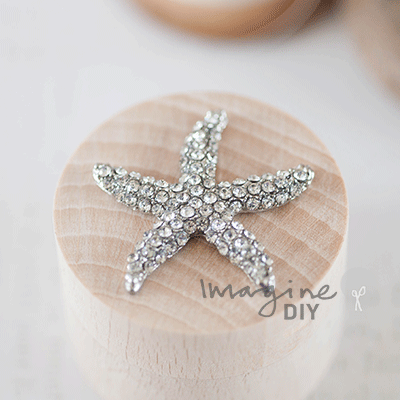
1 Crystal Starfish. (click here)
Other things you might need:
Hessian patterned paper
Paper Trimmer
Scorer
Tape runner or double sided tape (click here)
Hot melt glue gun. (click here)
Scissors
INSTRUCTIONS:
Print your invitation wording on to Kraft Paper and cut down to size. The finished size should be 13.5cm x 13.5cm. You should be able to fit 2 invitation panels on to 1 sheet.
Cut a sheet of Kraft Card 29cm x 14.5cm. Score and fold in half.
Stick your invitation panel to the inside of your scored card using double sided tape.
Cut a piece of Driftwood Aqua Paper 14.5cm x 14.5cm. Stick this to the front of your card using double sided tape. Make sure that the driftwood print runs from the top to the bottom of the card.
Cut a piece of Hessian Paper 14.5cm x 4cm. Stick across the front of your card.
Run a piece of double sided tape across the middle of the Hessian Paper, (covering the whole length). Trim off any loose edges when you reach the sides.
Press your Scalloped Lace on top of the Double Sided Tape. Cut off any loose edges.
Make a bow from your Jute Cord. The finished bow should be about 6cm wide when tied. Use your glue gun to stick this to the centre of your card (in the middle of the Hessian Paper and lace).
Use your glue gun to stick the Crystal Starfish on top of the bow.

Here’s How To Make The RSVP Cards
For each RSVP card you will need:1/4 sheet of Kraft Card. (click here)
1/4 sheet of Kraft Paper. (click here)
1/4 sheet of Driftwood paper in aqua. (click here)
Other things you might need:
RSVP Stamp (we used Noolibird RSVP stamp Typeface 1)
Smokey Grey Ink Pad (we used Versafine)
Pearlescent Jade Ink Pad. (we used Brilliance)
Paper Trimmer
Tape runner or double sided tape (click here)
A small starfish stamp (we purchased one on eBay)
INSTRUCTIONS:
Print your RSVP wording on to Kraft Paper and cut down to size. The finished size should be 11cm x 8.5cm. You should be able to fit 4 RSVP panels on to 1 sheet if you print in a landscape format.
Cut a sheet of Kraft Card 11.5cm x 9cm
Stick your RSVP panel to one side of the Card.
Cut a piece of Driftwood Aqua Paper 11cm x 8.5cm, making sure that the pattern runs down rather than across. Stick this to the other side of the card.
Cut a piece of Driftwood Aqua paper so that you have 1 length of wooden board with the brown gap showing at either side. Trim this to 8.5cm wide and stick along the bottom of the paper you have just stuck in to place (see the picture above).
Use your RSVP stamp and Smokey Grey Ink to stamp “RSVP” on the bottom left of your card (in the centre of the driftwood panel you just stuck in to place)
Use your starfish stamp and Jade Inkpad to stamp a starfish in the top right of the card.
Here’s How To Make The Place Cards:
For each Place card you will need:1/4 sheet of Kraft Card. (click here)
20cm Natural Hemp Cord. (click here)
1/8 sheet of Driftwood paper in aqua. (click here)
1 Small Crystal Starfish. (click here)
Other things you might need:
Paper trimmer
Smokey Grey Ink Pad (we used Versafine)
Pearlescent Jade Ink Pad. (we used Brilliance)
Tape runner or double sided tape (click here)
A small starfish stamp (we purchased one on eBay)
Alphabet stamps (we purchased a set on eBay)
Hot melt glue gun. (click here)
INSTRUCTIONS:
Cut a piece of Kraft Card 14cm x 10cm. Score and fold in half.
Cut a piece of Driftwood Paper 9.5cm x 6.5cm. Make sure that the pattern runs across rather than down. Stick this to the front of your folded card.
Use your alphabet stamps and Smokey Grey ink to print the guest names on to the front of your placecard………if you find this too much of a fiddle, you could always handwrite them on instead!
Use you Starfish stamp and Pearlescent Jade ink to stamp a starfish in the bottom right corner of the card.
Tie a small cord with your jute cord. The finished size should be about 4cm. Stick this to the top right of the card.
Stick your small crystal starfish on top of the bow using your glue gun.
Here’s How To Make This Cool Menu Card
(You can use the same design as an Order of Service if you change the stamp!):
For each Menu you will need:1 sheet of Kraft Card. (click here)
1/2 sheet of Kraft Paper. (click here)
1/2 sheet of Driftwood paper in aqua. (click here)
22cm scalloped lace. (click here)
30cm Natural Hemp Cord. (click here)
1 Crystal Starfish. (click here)
Other things you might need:
Menu Stamp (we used Noolibird Menu stamp Typeface 1)
Smokey Grey Ink Pad (we used Versafine)
Pearlescent Jade Ink Pad. (we used Brilliance)
Paper Trimmer
Scorer
Tape runner or double sided tape (click here)
Hot melt glue gun. (click here)
Scissors
INSTRUCTIONS:
Print your menu wording on to Kraft Paper and cut down to size. The finished size should be 20cm x 13.5cm. You should be able to fit 2 menu panels on to 1 sheet if you print in a landscape format.Cut a sheet of Kraft Card 29cm x 21cm. Score and fold in half.
Stick your menu to the inside of your scored card using double sided tape.
You will need to cut 2 panels of driftwood paper measuring 21cm high x 8cm wide. Make sure one panel has the print running down and the other has the print running across.
On the right side of your card, use the double sided tape to stick on the driftwood panel with the print running down.
Take your menu stamp and pearlescent jade ink and stamp on top of the driftwood panel a number of times in random places (but always running in line with the top and bottom of the card……please look at the picture). It doesn’t matter if you get ink on the card behind because you will be covering that with your next panel.
Once you have done this, clean your stamp, take your Smokey Grey Ink Pad and stamp a few more times.
Stick the other driftwood panel on the left side of your card (it will slightly overlap the panel you just stuck down and stamped on).
Measure Cut 2 pieces of Hessian Paper 2.5cm x 8cm. Use double sided tape to stick these in to place across 2 driftwood panels on the left side of your card.
Run a line of double sided tape along the join where the 2 driftwood panels meet. Press your Scalloped Lace on top of the double sided tape and trim off any loose ends at the top and bottom of your card.
Tie a small bow with your jute cord. The finished size should be about 6cm. Use your glue gun to stick this in to place in the middle of the scalloped lace, about 5cm from the bottom of the card.
Use your glue gun to stick the crystal starfish on top of the bow.