How To Make .... Chic Personalised Wedding Menu's
I'm a strong believer in getting the details right. Elegant personal touches are a perfect way of setting the scene for your wedding or event. These chic personalised menu's are quick and easy to make and cost little more than a placecard.
They can also be easily customised to fit the theme of your special day.
If you fancy giving it a go, here's how .....
For Each Menu You Will Need:
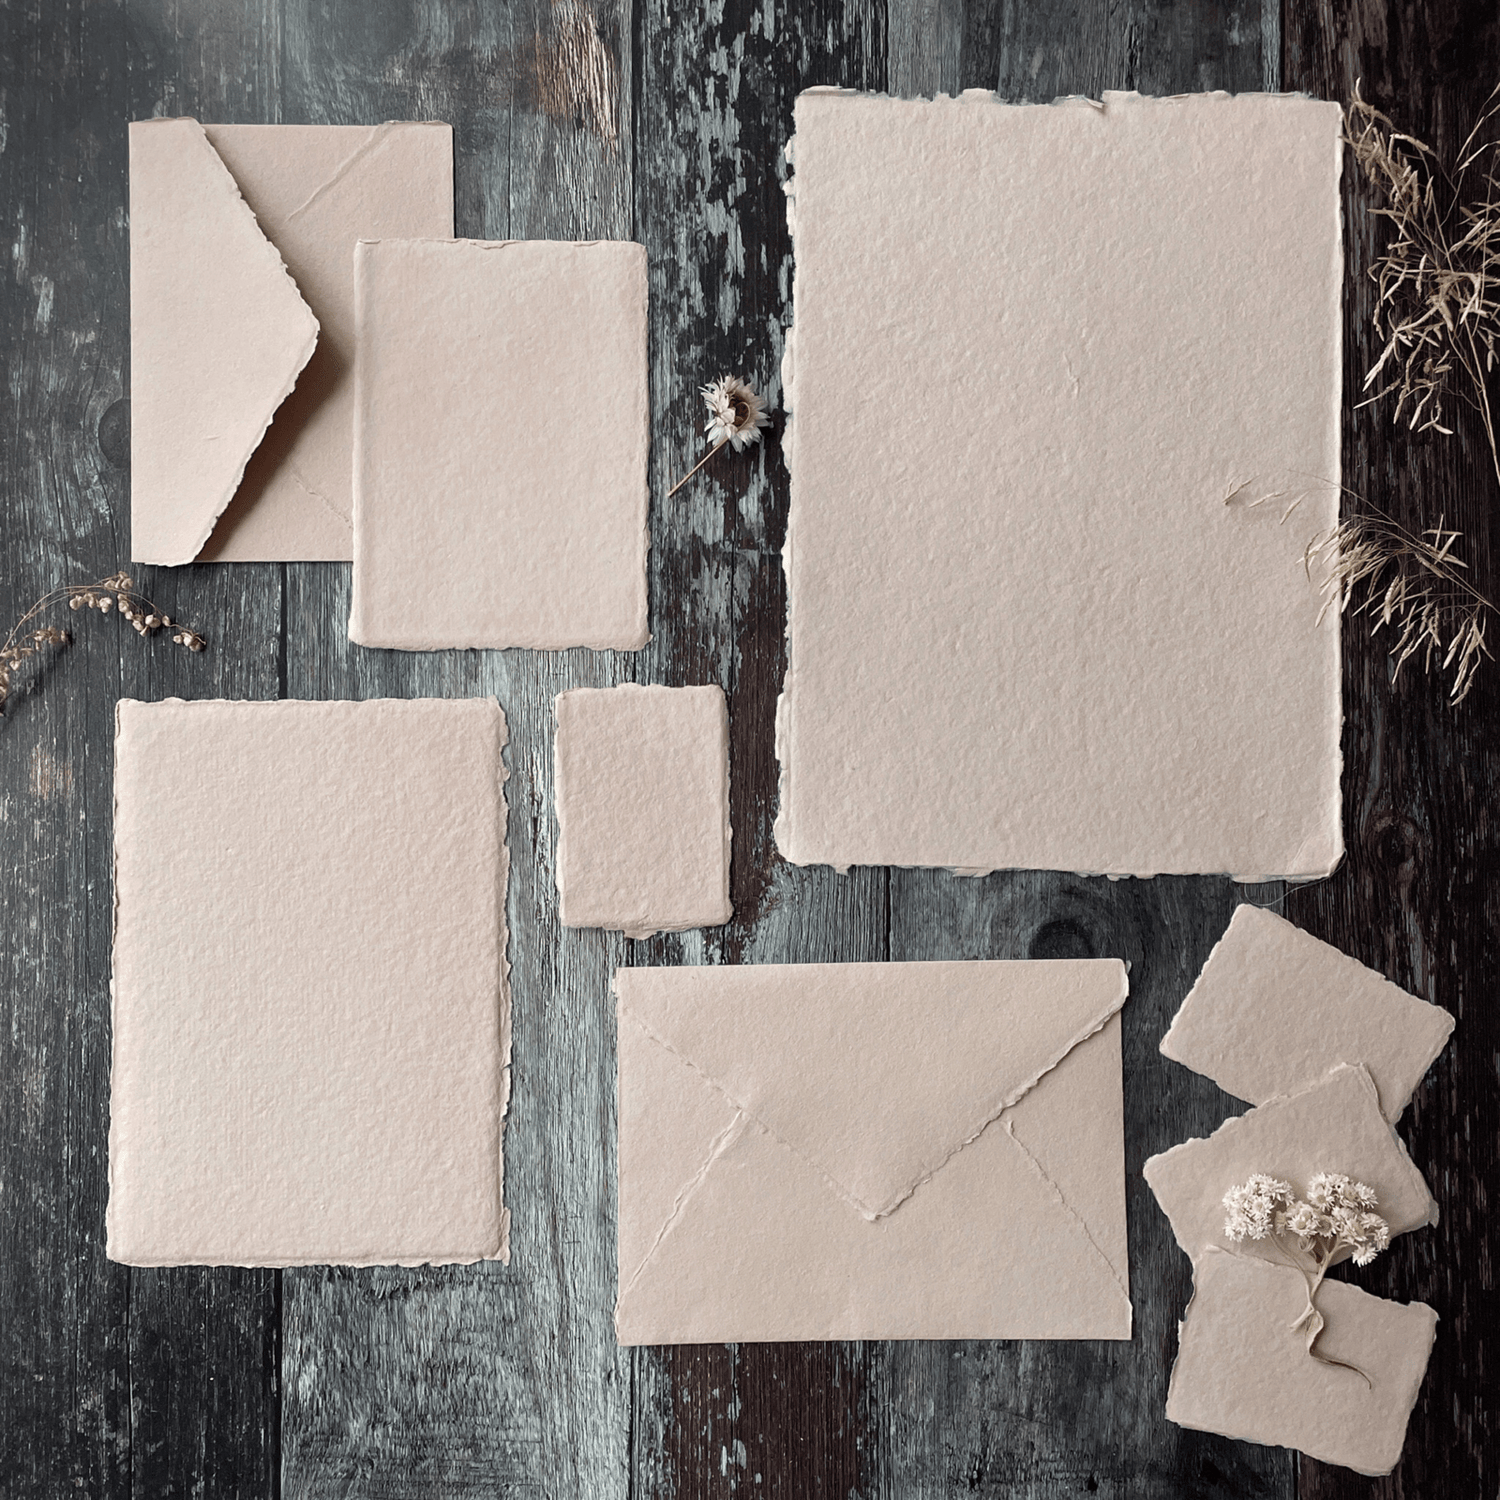
1/3 x Sheet of A4 Card (I've used Matt Off White)
1/4 x Sheet of 5 x 7 Handmade Card in Blush Pink
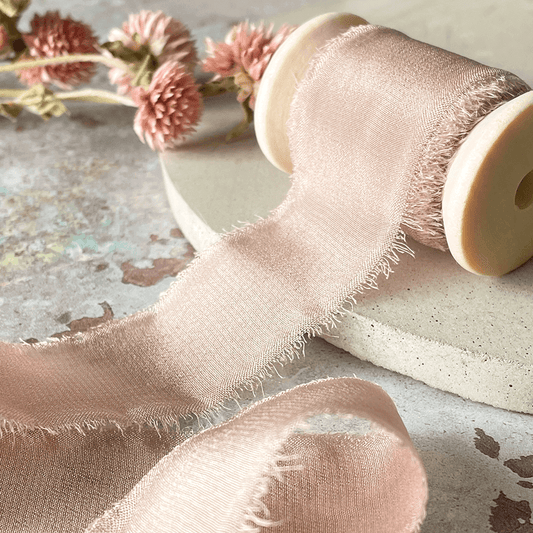
20cm x Nude Blush Silk Ribbon with Raw Edge
You'll also need:
A hole punch
Scissors
Paper Trimmer
So Here Are The Instructions……

STEP 1
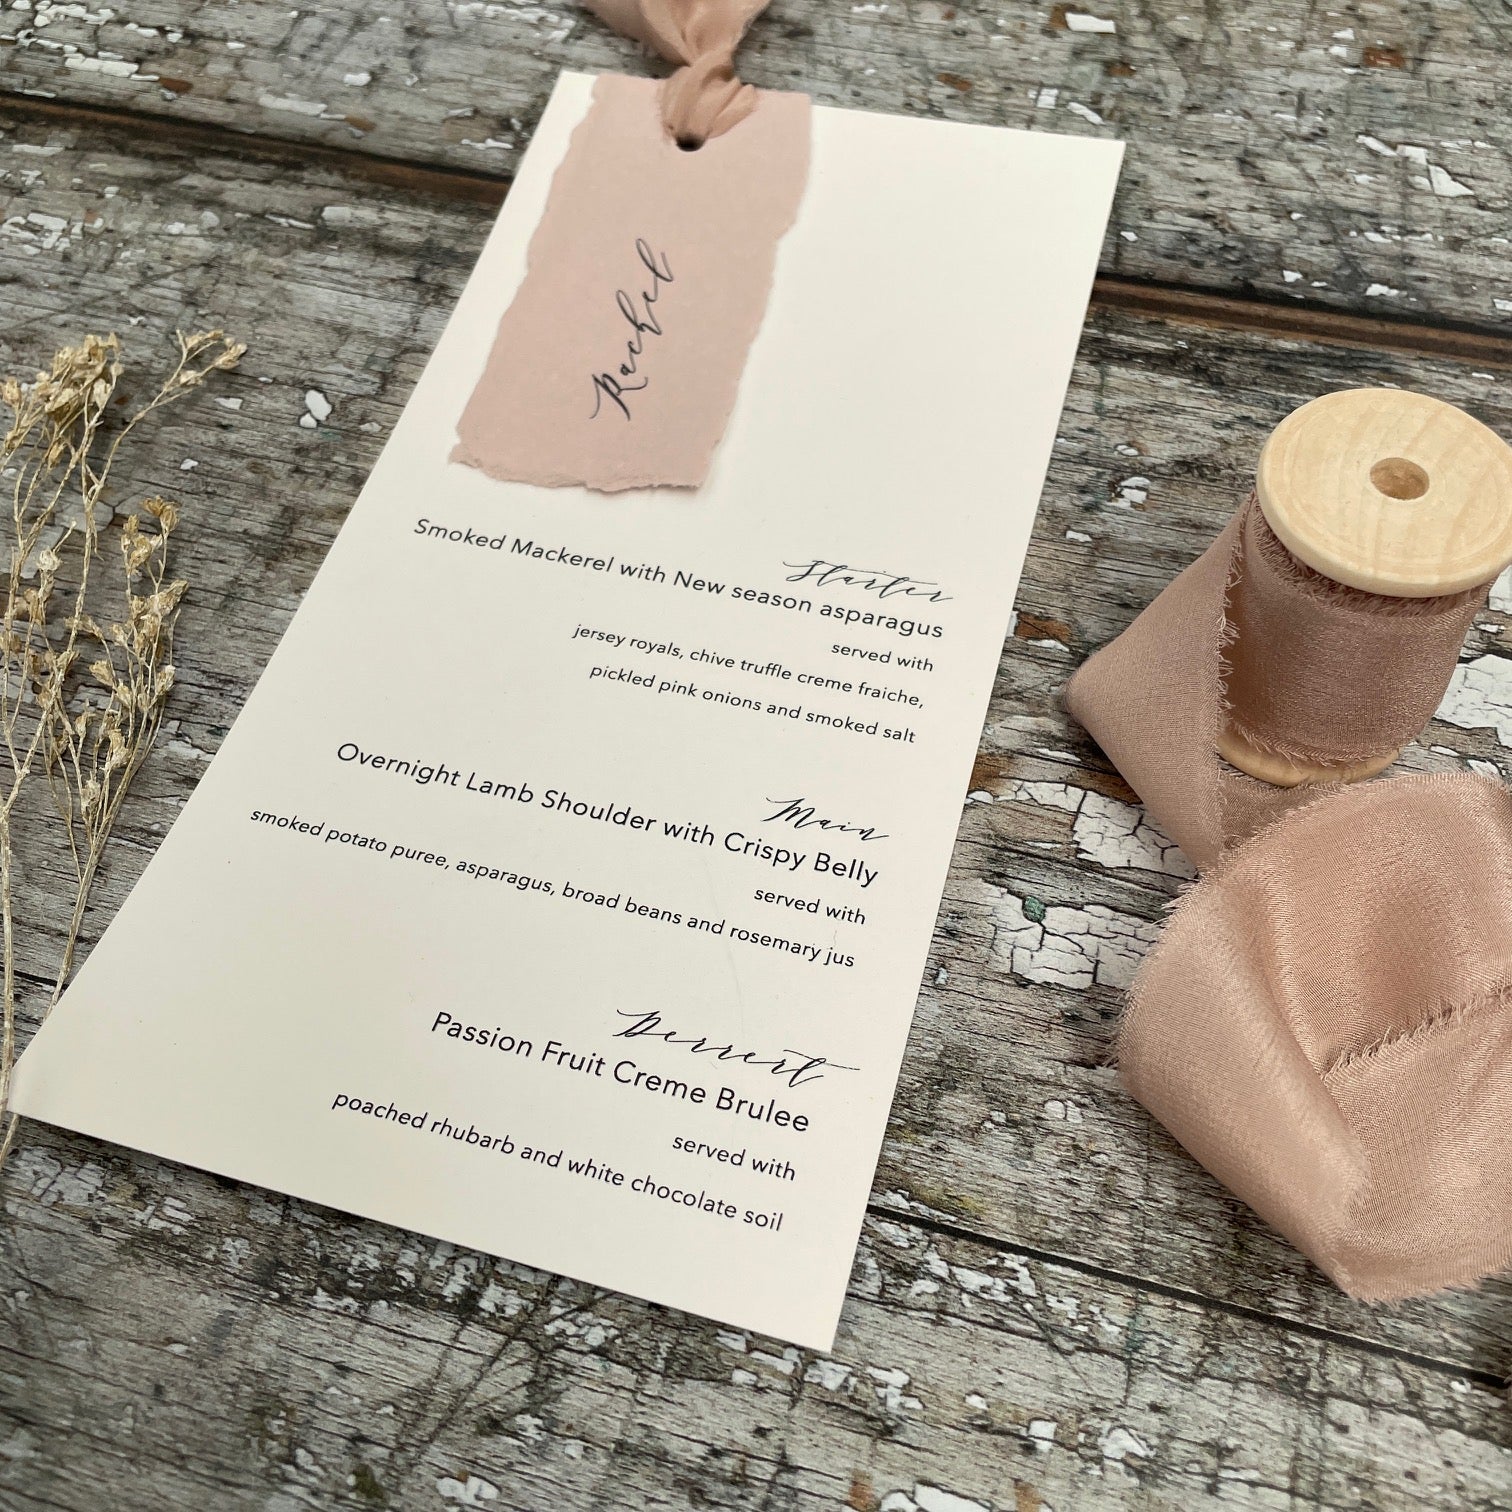
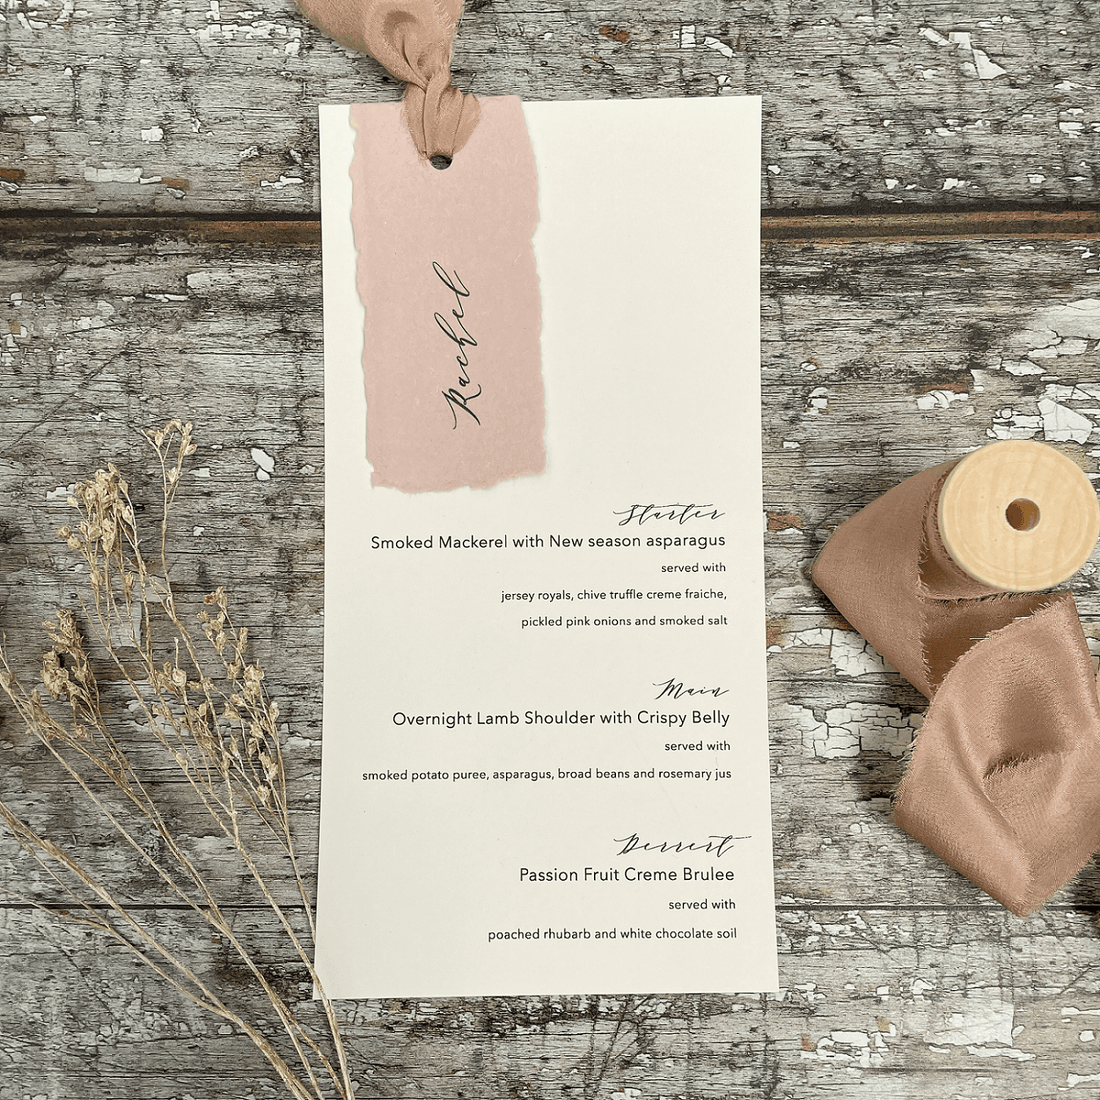
Print your Menu Wording onto A4 Card. Make sure you leave a large empty gap at the top of your design.
TIP - I have only printed one menu onto this sheet, but If you lay this out carefully, you should be able to fit 3 menus onto each sheet (measurements: 9.5cm wide x 21cm high).

STEP 2
Print your names onto the 5x7 handmade card. Make sure you set the names to the left side of the card, allowing for a nice sizes border on each.
TIP - I have only printed one name onto this sheet, but you should be able to easily fit 4 names on each sheet, allowing for a border around each name.

STEP 3
Use a paper trimmer to cut your menu down to size. The finished size should be appx. 21cm high x 9.5cm wide.


STEP 4
Cut your name tags down to size, To do this, you'll need to hold a ruler flat against the card. Gently tear the card along the edge of the ruler. Pulling the card away from the ruler slightly so that you have are left with uneven edge. Do not trim the top edge of the name tag at this stage.

STEP 5
Place your name card on top of your printed menu. Position it so that the name is in the right place. You will then need to hold the name card into place and use a scissors to cut off the top edge so that it sits flush against the menu.

STEP 6
Holding the name card into place, use a hole punch to punch a hole through both the name card and the menu.

STEP 7
Cut a piece of silk ribbon 20cm long. Fold it in half. Push the fold of the ribbon through the hole in both cards, starting at the back and pushing through to the front. This should leave you with a loop of ribbon at the front and loose ends at the back.

STEP 8
Pull open the loop in the ribbon. Take hold of the loose ends of ribbon at the back of the card and feed them through the loop from the back to the front. Pull the ribbon so that the loop closes and it looks like the picture above.
If you'd like, you can use a scissors to trim off the ends of the ribbon.

IT'S AS EASY AS THAT!!!
In my opinion, the hardest thing about making these beautiful menu's is setting up the printing. Once you've got that mastered, the rest is easy.
Although these are not expensive to make, if you're on a tight budget, you can reduce the cost further by replacing the silk ribbon for satin.