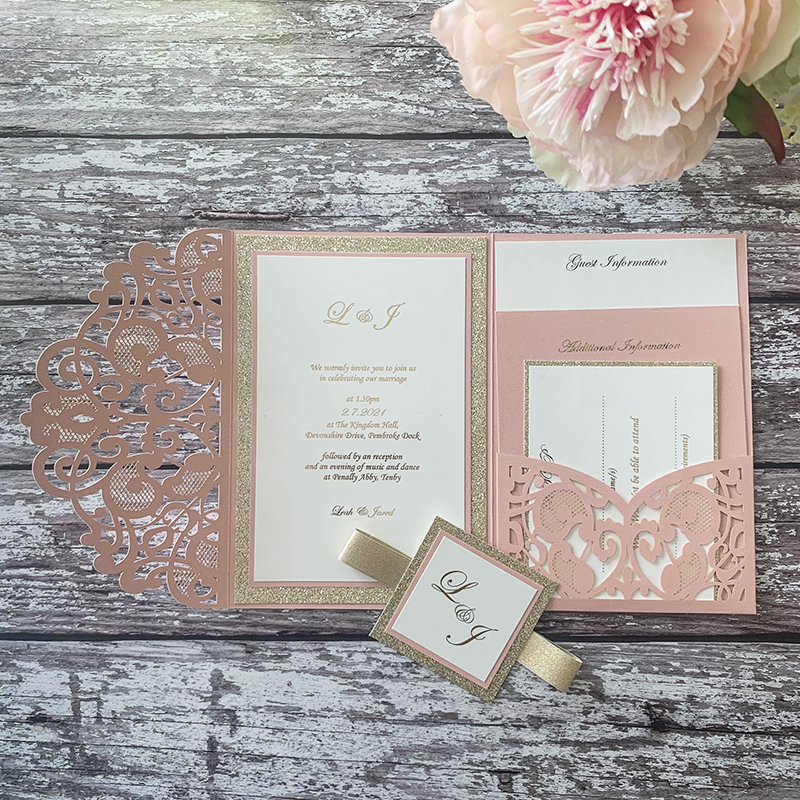
How To Make Elegant Pocket Fold Invitations
These super chic DIY invitations are really easy to make at home.
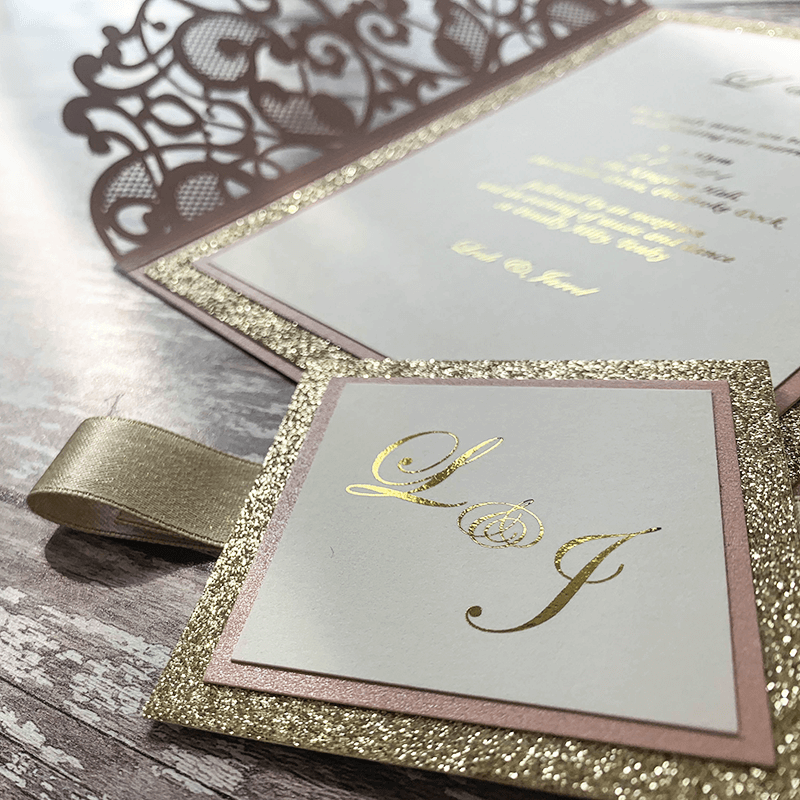
We've used a simple DIY gold foil technique to achieve a really professional finish. But if you decide to skip that step, your invitations will still look beautiful.
I chose a blush pink and gold colour scheme for this design. But you can easily alter the colour scheme to suit your own theme. The Elin Invitation used in this design is also available in a pearlised white or ivory. You could also choose an alternative laser cut design of your choice.
For Each Invitation You Will Need:
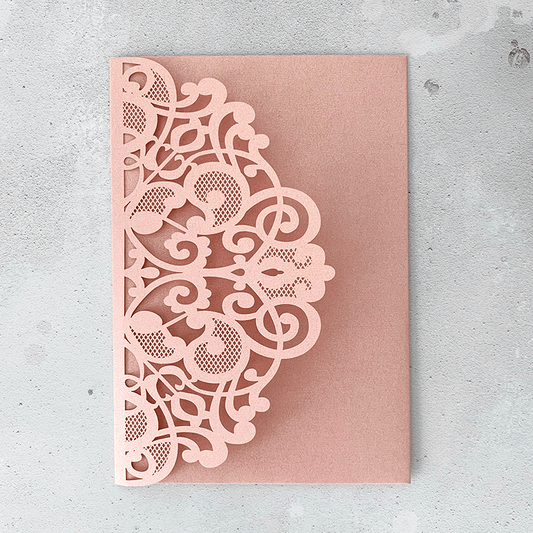
1 x Elin Laser Cut Pocket invitation in Blush Pink. (click here)
1 1/2 sheets of Matt Off White Card. (click here)
1 sheet of Champagne Charm Glitter Card. (click here)
1 sheet of pearlised blush pink card. (click here)
30cm x 16mm Gold Sparkle Ribbon. (click here)
Also:
Envelope. (click here)
High Tack Tape. (click here)
Paper Trimmer
And If Foiling.......
Toner Reactive Foil
Laminating Machine
If you’re not big on reading instructions, we’ve put together a video to show you how it’s done. (just press play)……
(Scroll to the end of the post for instructions on applying Gold Foil)
INVITATION TEMPLATE
GUEST INFORMATION, FRONT TAG and RSVP TEMPLATE
ADDITIONAL INFORMATION TEMPLATE
We used the following font:
Monotype Corsiva and Edwardian Script
So Here Are The Instructions……

PRINTING
- Download the following templates:
INVITATION TEMPLATE
GUEST INFORMATION, FRONT TAG and RSVP TEMPLATE
ADDITIONAL INFORMATION TEMPLATE
Type your wording in the spaces provided. Make sure you check that the spelling, grammar and layout are all correct. You will also need to check that the times, dates and locations are all included.
We used the following fonts....Monotype Corsiva and Edwardian Script - Cut a piece of Blush Pink Card to 11.5cm wide x 14cm high. Print your additional information onto this piece of card
- Cut a Piece of Off White Card to 10cm wide x 15.5cm high. Use this to print your invitation wording onto.
- Print the Guest Information, front Tag and RSVP onto a sheet of Matt off white card. Once it is printed, trim to the following sizes:
Guest information - 11.5cm wide x 17cm high
RSVP - 8.5cm high x 11cm wide
Front Tag - 5cm x 5cm
If you'd like to apply gold foil to your invitations, scroll to the end of the post for additional instructions. It's really easy and well worth the effort!! But if you decide not to do it, don't worry! These invitations will still be stunning!
ASSEMBLING
- Cut a piece of Champagne Charm Glitter Card 17.5cm x 12cm
Cut a piece of Blush Pink Card 16cm x 10.5cm
Open up the laser cut invitation and use high tack double sided tape to stick the Glitter Card Panel on to the main section of the invite, making sure that the borders are even.
Stick the Blush Pink Card onto the Glitter Card Panel.
Stick the Printed Invitation Panel on top of the Blush Pink Card. - Slot the Guest Information Card into the pocket
- Slot fate Additional Information Card into the pocket, so that it sits in front of the guest information
- Cut a piece of Champagne Charm Glitter Card 9cm x 11.5cm.
Use High Tack Double Sided tape to stick the RSVP Panel on top of this glitter card panel.
Slot into the pocket and close your invitation. - Cut a piece of Champagne Charm Glitter Card 6.5cm x 6.5cm
Cut a piece of Blush Pink Card 5.5cm x 5.5cm
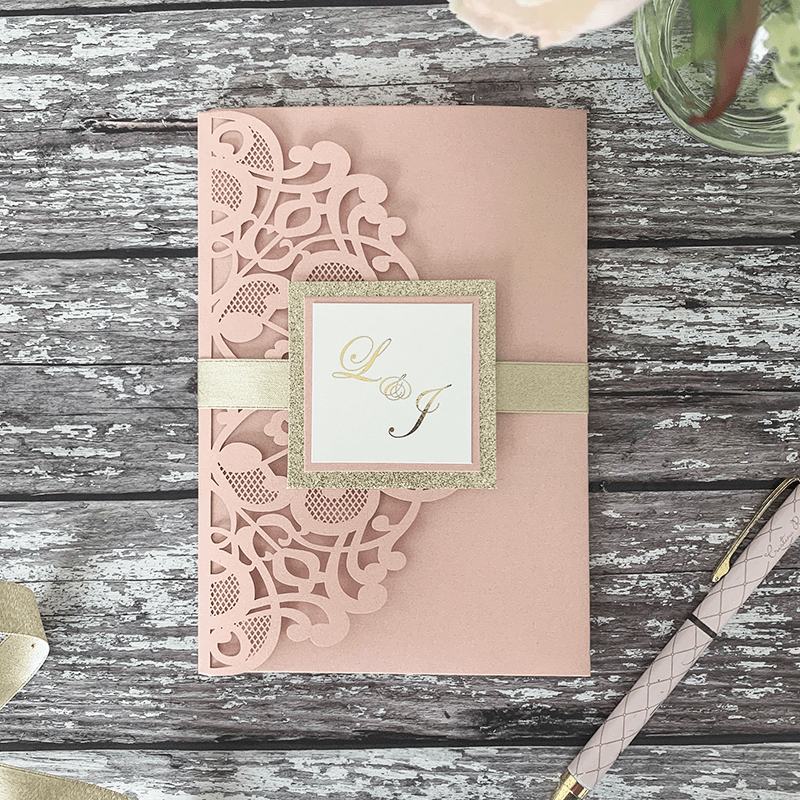
Use high tack double sided tape to stick the Blush Pink Card onto the Glitter Card. Mount the Printed tag panel on top of the blush pink card. - Cut a piece of Gold Sparkle Ribbon appx 28cm long. Lay on a flat surface and place your invitation on top. Wrap both ends in towards the front centre of the invitation and use your double sided tape to stick one end of the ribbon on top of the other to form a continuous band.
- Place a line of double sided tape horizontally across the back of your front tag. Carefully stick this in to place on top of the ribbon, adjusting so that it sits neatly in the middle.
And you're finished.......sit back and admire your work!!

Watch the video below to find out how to add gold foil to your invitations.