Winter Wedding Ideas - Snowflake Invitation Design Guide
Nothing captures the winter better than snowflakes, right? That's why this gorgeous design not only captured my heart instantly...but also I wish I was planning my own winter wedding!
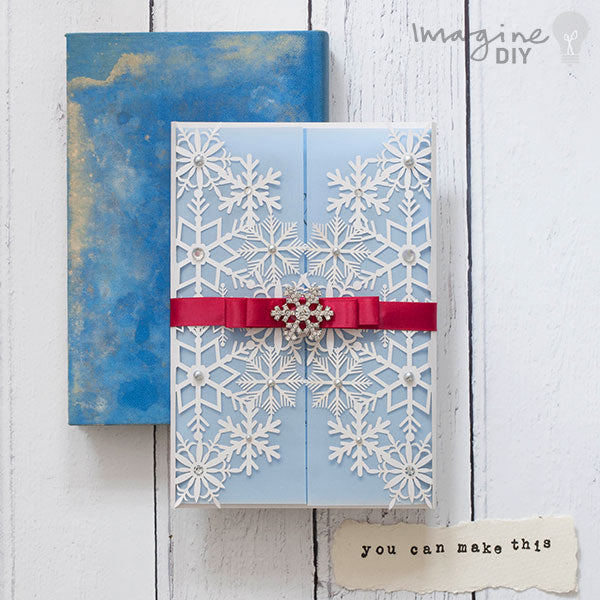
Are you still looking for the perfect winter wedding ideas? Then this is a great invitation for you - not only to wow your guests - but also to really get them in the mood for your special day! Although the white of the laser cut works perfectly with the ice blue, silver and raspberry red, you can easily change the colours or embellishments to suit your own special day.

SHOPPING LIST
1 x Sansa Laser Cut Invitation (click here)
1 sheet of Pearlised Blue Card (click here)
1 sheet of Clear Vellum (click here)
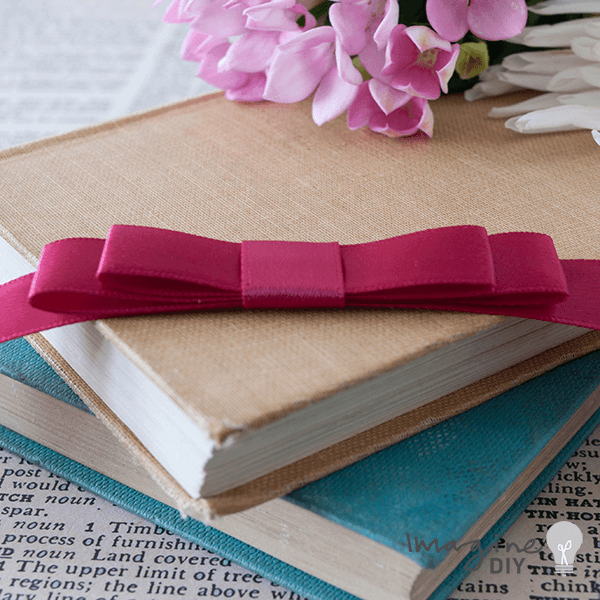
1 Raspberry Dior Bow (click here)
1 Frozen Small Embellishment (click here)
Appx. 20 self adhesive silver pearls (click here)
You Will Also Need:
Paper Trimmer
Tape Runner (click here)
Hot melt glue gun (click here)
plus a sharp scissors

INSTRUCTIONS
- First of all print your wording on a sheet of A4 Maya Blue Paper and cut to size using your paper trimmer. The finished size should be 17.5cm x 12.25cm. You should be able to fit 2 printed panels on to each A4 sheet.
- Secondly use your paper Trimmer to cut a piece of Maya Blue Card 18cm x 12.75cm. Use your tape runner to stick the printed invitation panel on top of your card.
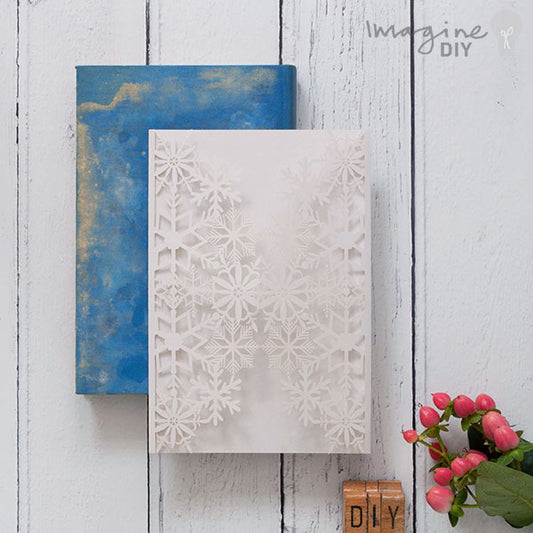
- Cut a piece of Vellum Paper 18cm x 26cm. Place your invitation panel in the centre and carefully fold the 2 sides of the vellum over the front of the invitation, meeting in the middle. Press the folds down firmly along the sides.
- One by one, peel off a self adhesive pearl or crystal and stick to the centre of the snowflakes at the front of the Sansa laser cut invitation. You can do this randomly or uniformly...it's up to you. Either way looks great!
- After you finished the snowflakes place your Dior Bow face down on a flat surface. Likewise place your invitation face down on top of the dior bow. Make sure you place the dior bow roughly in the centre (back of the invitation should be facing you at this point). First fold one end of the loose ribbon around to the back of the card and hold it flat. The second step is now to fold the opposite piece of ribbon around to the back of the card so that it sits on top of the piece you are holding in to place. You don't want to leak nay glue on to the invitation, right? That's why it is important to use a small amount of glue from the glue gun to secure the top piece of ribbon on to the bottom piece. As you are gluing, you will need to make sure that you do not pull the ribbon too loosely or too tightly (you don't want it to fall off because it is so loose but you also need to be able to slide it off when you need to).
- Then turn the card over so that the front is facing you. Adjust the bow so that it is sitting in the centre of the card. To complement the invitation use the glue gun to stick the Frozen embellishment on to the centre of the ribbon and you're almost finished.
- Finally we reached our last step. You can now slot your invitation inside.

