Make Your Own Glamorous Gold Wedding Invitations
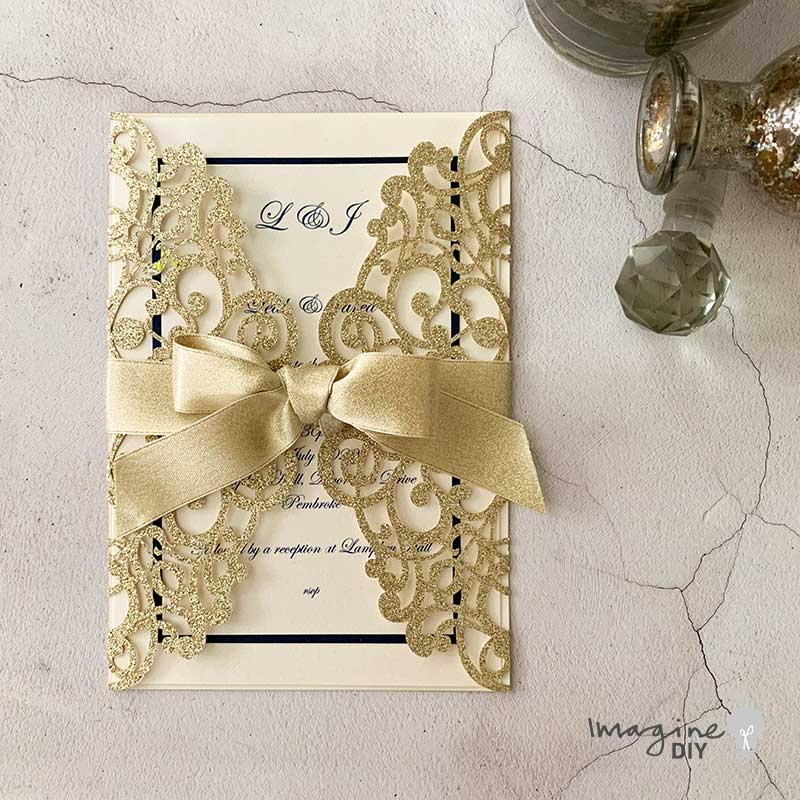
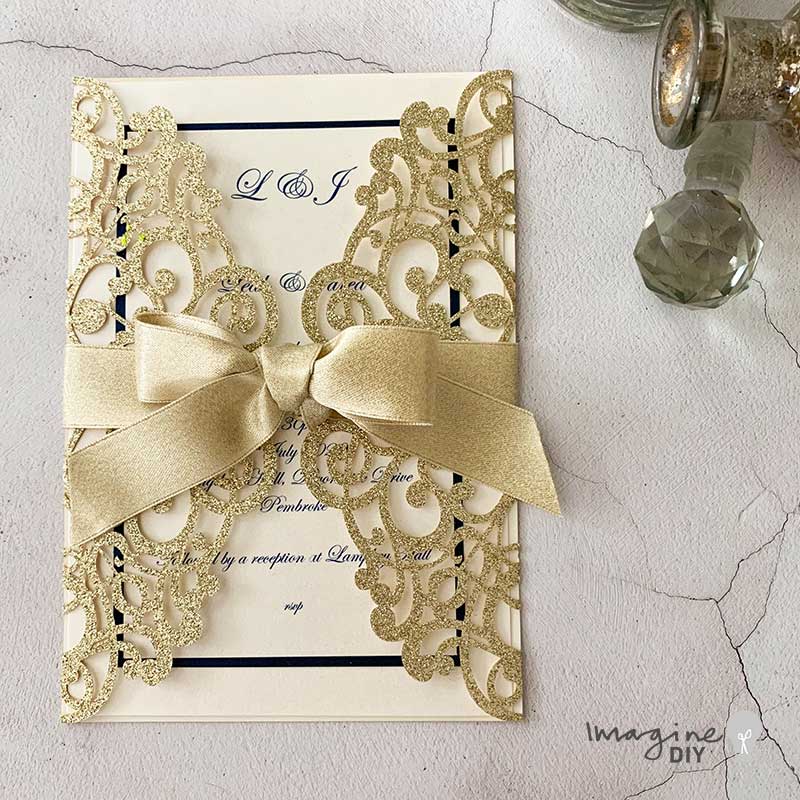
This glamorous DIY wedding invitation looks like it will break the bank. But in fact, you will barely even need to empty the loose change from your pockets to create these beautiful invitations at home. The navy border and gold sparkle ribbon really add a sense of chic to an already beautiful laser cut invitation.
The best thing about this design is that if you can tie a shoelace, you can make these with ease. You don't need to be an avid crafter. Why not give it a go and really impress your guests?
For Each Invitation You Will Need:
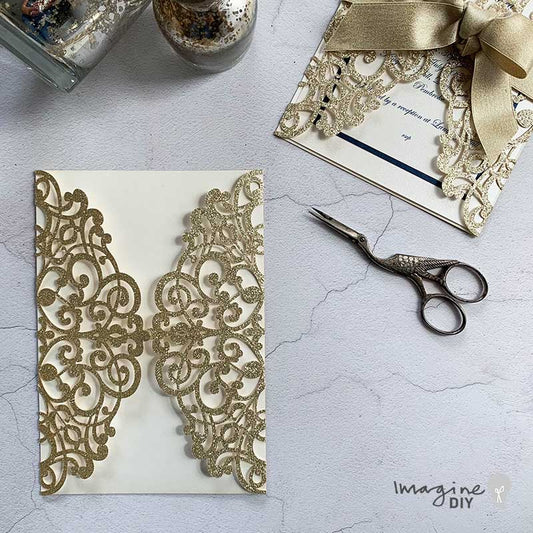
1 x Lavish Laser Cut Invitation in Champagne Gold (click here)
1 sheet of Pearlised Ivory Card (click here)
1/3 sheet of Pearlised Navy Card (1 sheet makes 3 invitations) (click here)
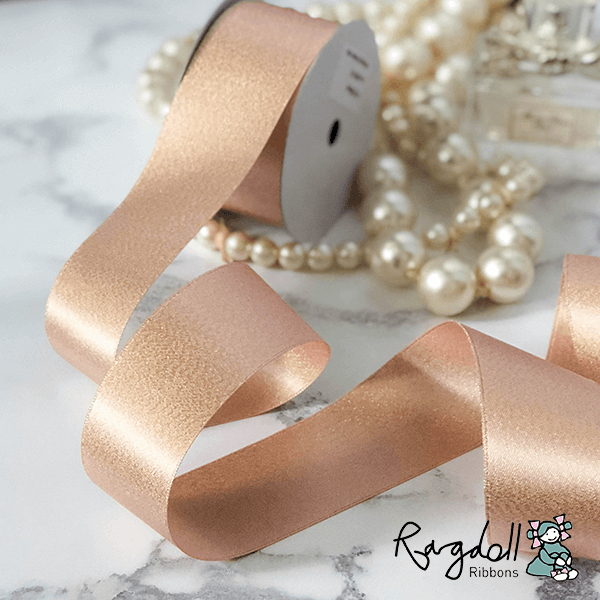
70cm of Gold Sparkle Ribbon 22mm (1 roll makes 13 invitations) (click here)
Also:
PaperTrimmer (you only need one of these!)
Tape Runner (click here)
Scissors
TIP – Change the backing card, or ribbon to coordinate with your theme.
If you’re not big on reading instructions, we’ve put together a video to show you how it’s done (just press play)……
You’ll also need to download this template…..
We used the following font:
Edwardian Script
So Here Are The Instructions……

Instructions
- Use your paper trimmer to cut your Pearlised Ivory card to the following measurements: 17.5cm x 12cm 14.5cm x 9cm
- Use your paper trimmer to cut your pearlised navy card to 15cm x 9.5cm. (you should be able to cut 3 panels out of each sheet)
- Download the INVITATION TEMPLATE. Type your wording in the printable areas. (We used the following font……..Edwardian Script).
Print onto the Smaller Pearlised Ivory Card Panel. - Use your tape runner to stick tape around the outside edge and across the middle of the navy card panel. Stick this in to place on top of the larger pearlised ivory panel, making sure that the borders are even.
- Use the tape runner to stick the printed invitation panel on top of the pearlised navy card.
- Open up your laser cut invite and place the completed printed invitation panel inside.
- Cut a length of ribbon appx. 70cm long. Place the ribbon on a flat surface. Position your invitation face up in the centre of the ribbon.
- Pull the loose ends of the ribbon in towards the centre of the invitation. Tie a neat knot. Tie a second knot over the top so that you have a double knot. You can now tie your bow. This may take a little fiddling but essentially you are just using the same method as tying a shoe lace. If you are struggling, watch the video tutorial above.
- Now all you need to do is neatly cut off the loose ends of the ribbon.
It really was as easy as that! You now have a beautiful invitation ready to send out to one of your special guests. It's time to get excited!