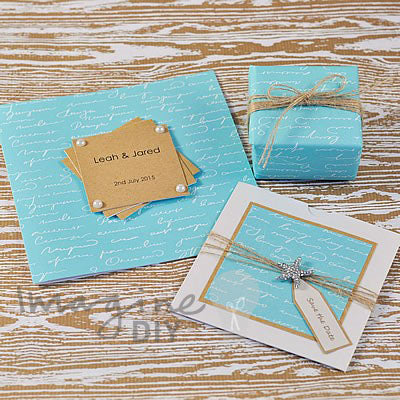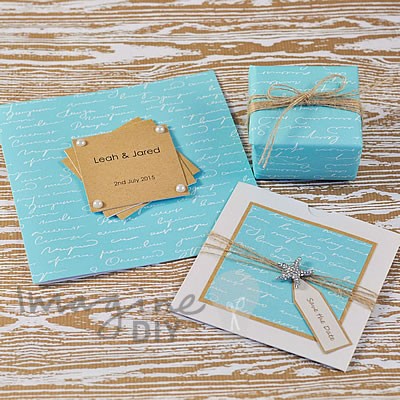
If like me, you love the beach, these Laguna Aqua Invitations design capture the feeling perfectly.
Living by the sea or heading abroad for your beach themed wedding would be perfectly captured using our aqua and kraft coloured materials, not forgetting a subtle bit of bling using our gorgeous miniature crystal starfish.Follow these step by step instructions to create them for your own wedding.
INVITATION

To make this beach theme wedding
invitation you will need:
1 sheet of matt off white card. (click here)
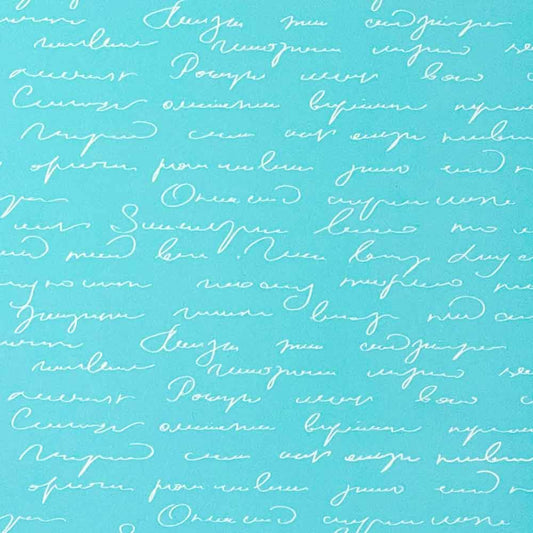
1/2 sheet of Love Notes Laguna Paper. (click here)
4 x 6mm self adhesive pearls. (click here)
1 sheet of Kraft Paper. (click here)
1/4 sheet of Kraft Card. (click here)
Other items you may wish to consider:
Double Sided Tape. (click here)
Paper Trimmer
Scorer
Mini mounting pads of foam pads
INSTRUCTIONS
INVITATION- Cut your Off White A4 Card to 14.5cm x 29cm. Score and fold in half.
- Cut a piece of Love Notes Laguna Paper to 14.5cm x 14.5cm. Use double sided tape to stick this to the front of your card.
- Print your wording on to a sheet of A4 Kraft paper and cut to size.
The finished size of the invitation should be:
Invitation panel - 28cm x 13.5cm with the wording offset to the right half of the sheet (so that when it's folded in half, it sits in the centre of the right hand side)
Front panel - 6cm x 6cm
- Fold your invitation panel in half and use double sided tape to stick it to the inside of the invitation
- Cut 3 pieces of Kraft Card 6cm x 6cm.
- Use double sided tape to stick your front panel wording on to one of the Kraft Card Panels.
- Take one of the panels and lay it flat. Use double sided tape to stick another panel on top at a slight angle. Stick your front wording panel on top, again at a slight angle.
- Use mini mounting pads to stick the layered panel to the centre of the card. Make sure that the wording is parallel to the bottom of the card.
- Stick a 6mm self adhesive pearl to each corner of the front panel.
FAVOUR BOX

To make this pretty favour box, you will need:
A small favour box
2/3 sheet of Love Notes Laguna Paper. (click here)
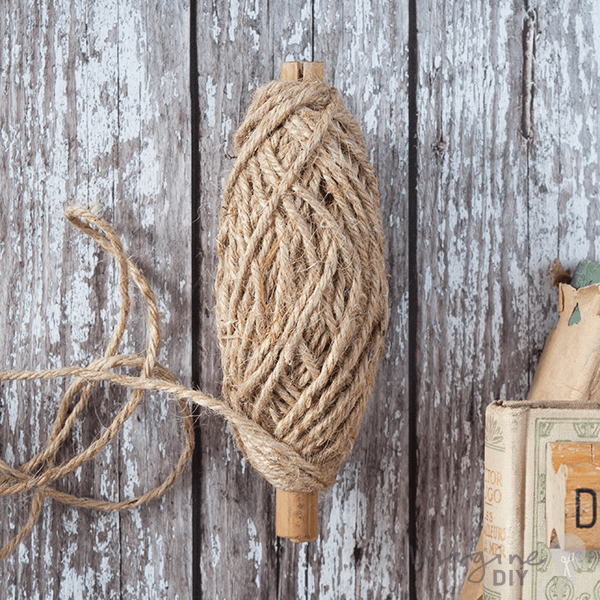
Natural Flaxcord. (click here)
Double Sided Tape. (click here)
Paper Trimmer
INSTRUCTIONS
FAVOUR BOXIf you're any good at wrapping presents, this one if for you!
- Firstly, you will need to assemble and fill your box ready to be wrapped.
- Cut a piece of Laguna Love Notes paper twice the width of your box.
- Place your paper face down on a flat surface and put your box (face down) in the centre.
- Stick double sided tape on the far end of the paper. Pull the end nearest you up to the centre of the box and hold in place. Pick up the end with the double sided tape and pull over the top, sticking in to place. You should end up with a glued join in the centre of your box at the bottom.
- Turn your box around so that it is facing up. Pull one of the open ends to face you.
- Push up the bottom of the loose paper so that it touches the side of the box, folding in to place as you go.
- Pull both sides in to the center, again folding in to place as you go.
- You should now have a sort of pointed flap at the top end. You can run double sided tape along this and press it down in to place.
- Repeat this on the other open side.
- Cut two long lengths of fine jute string and hold them together.
- Starting about 20cm from the end of the string (you will need to leave this loose to finish the bow at the end), wrap it around and around your box at least 5 times. When you are happy, pass your loose end underneath and around the string at the top of the box. Wrap your loose end in the opposite direction so that between the two ends, you have secured the string together. Tie a knot and make a bow, cutting off any loose ends.