Make Your Own Luxury Wedding Invitations with Monogram Belly Band
If you want to make a statement with your wedding invitations, this design is perfect! The glitter background combined with a beautiful laser cut creates a sense of luxury and decadence that's hard to match. And better still, you won't have to break the bank to make them!
For Each Invitation You Will Need:
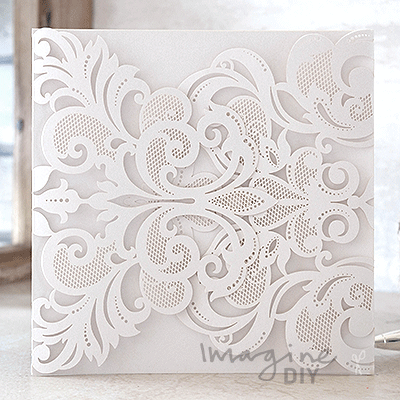
1 x Rococo Laser Cut Invitation in White (click here)
1 sheet of Pearlised White A4 Card (click here)
1 Pearlised White RSVP envelope
1 sheet of Sequin Glitter Paper in Champagne (click here)
Also:
PaperTrimmer (you only need one of these!)
High Tack Double Sided Tape (click here)
Once you've got the knack of using the paper trimmer, these invitations are really easy to make.
TIP – Change the glitter paper to coordinate with your theme.
If you’re not big on reading instructions, we’ve put together a quick video to show you how it’s done (just press play)……
You’ll also need to download this template…..
INVITATION, RSVP Card and Front Tag
So Here Are The Instructions……

Instructions
- Download the Templates for the INVITATION, RSVP Card and Front Tag. Type your wording in to the printable area and print on to the Card.
- Using the guides provided, use your paper trimmer to cut each piece to the following size: Invitation Panel - 10.5cm x 10.5cm RSVP Card - 12.5cm x 8.5cm Front Tag - 5cm x 5cm
- Use your paper trimmer to cut your glitter paper to the following sizes (in the order listed below): 2.5cm wide x 29.8cm long 14.5cm x 14.5cm 13cm x 9cm 6cm x 6cm
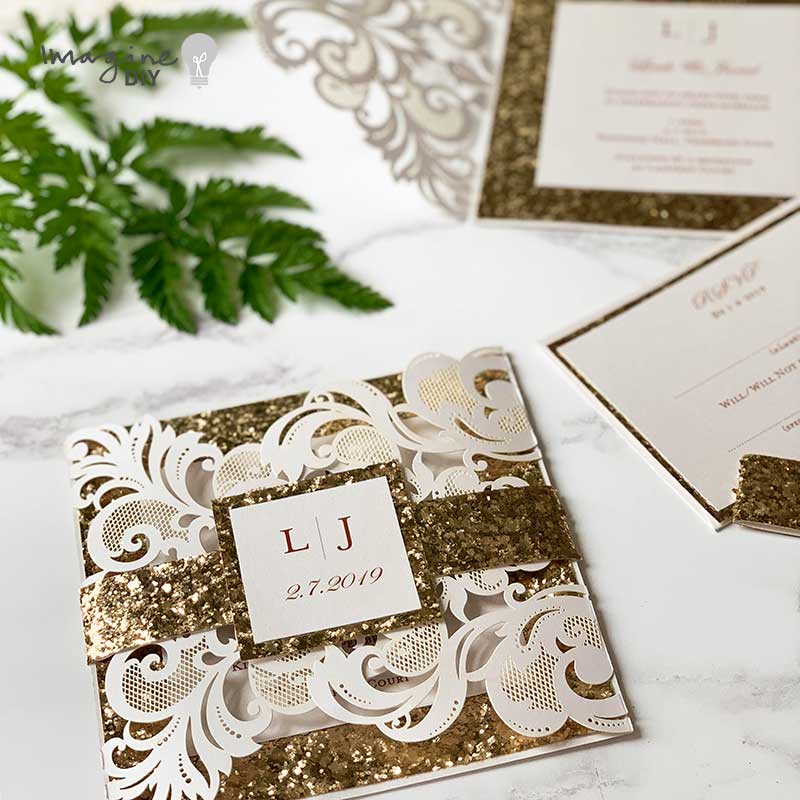
- Use your double sided tape to stick the large glitter panel to the inside of the laser cut invitation.
- Stick the printed invitation panel on top of the glitter panel, making sure that the borders are even.
- Take your printed RSVP card and the glitter backing and stick together using double sided tape. Put this inside the flap of the RSVP envelope and place on top of the invitation panel.
- Place the long strip of glitter card face down on a flat surface. Close your invitation and place it on top of the strip so that it sits roughly in the middle. Fold both ends of the strip in towards the front of the card and press in to place along the edges.
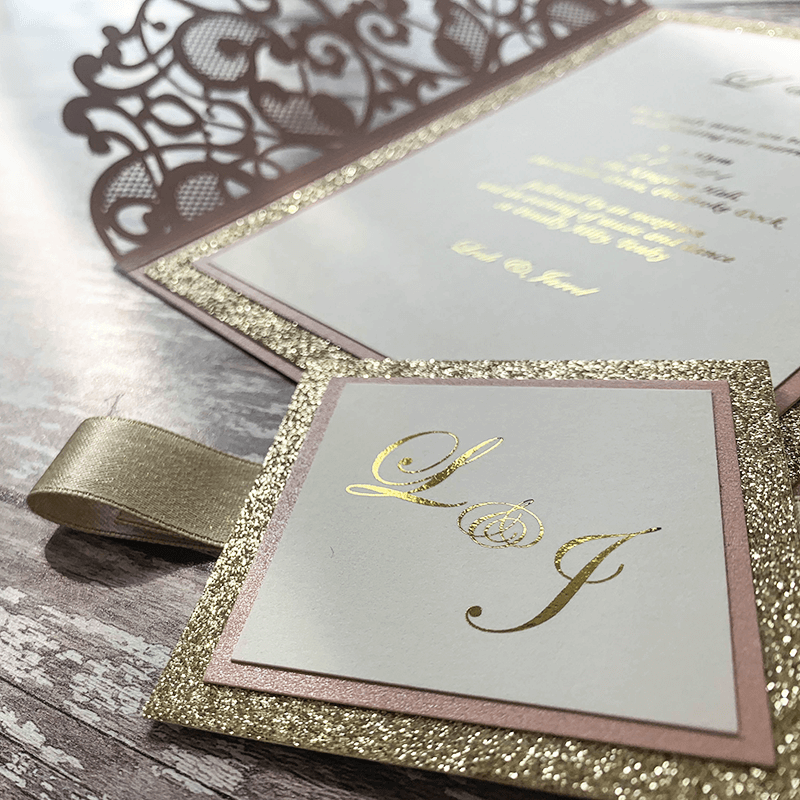
- Take the front tag and the matching glitter backing and stick together using double sided tape.
- Peel off 2 small strips of double sided tape and place them on the back of the front tag, appx half way down on opposite sides. Fold over any excess tape.
Holding the both ends of the long strip flat against the invitation, position your front tag and press it firmly in to place. - Reposition your belly band until it sits neatly on your invitation. And you're done!! A beautiful wedding invitation all ready to send to one of your guests.
TIPS
1 – If you are printing on to pearlised card, you will need to use a laser printer. If you are using an inkjet, we recommend swapping the pearlised card for matt card)