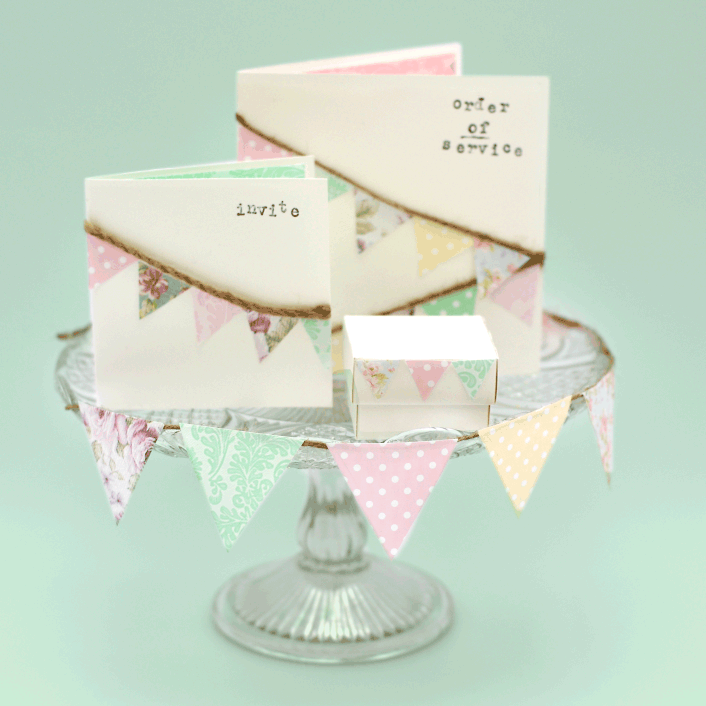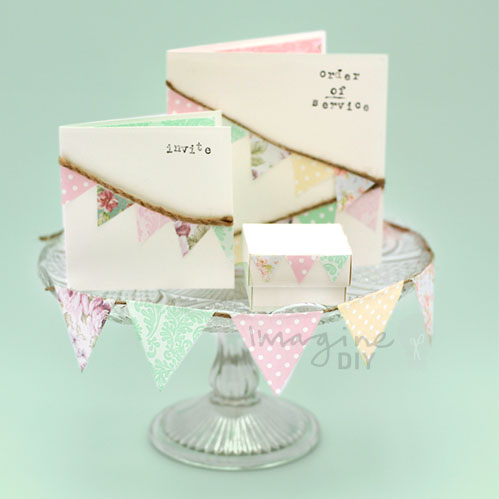
Pretty Bunting Wedding Stationery.
Who doesn’t love bunting? It’s enough to warm even the hardest of hearts, creating a welcoming sense of fun. So what better way to introduce your guests to your special day than with this cute bunting theme wedding stationery.
We have carefully chosen complimentary papers from the range available at Imagine DIY. However, bunting is so versatile you can mix and match any off cuts that you have. Choose different patterns and textures to suit your own chosen theme or even give each guest their own unique invitation, using papers that you know they will love. Let your imagination go wild and have a go yourself.
Here’s how we made this fun range:

INVITATION
For each invitation you will need:
1/2 sheet of Matt white card. (click here)
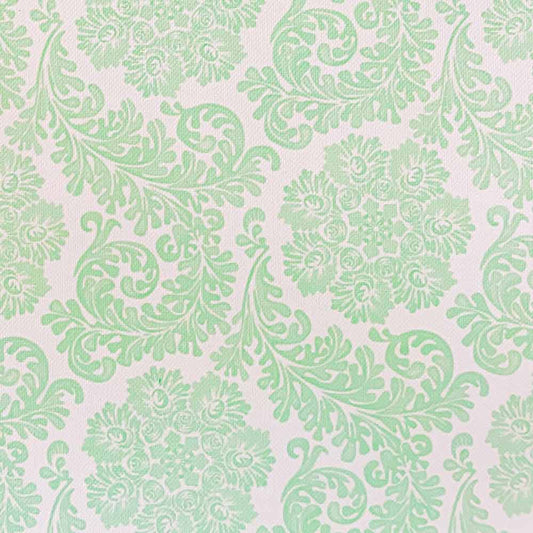
Small off cuts of paper. (we've used polka pink linen, evelyn linen, josie linen, beatrice linen and mint Josie linen). (click here)
1/2 sheet of Josie Linen in mint. (click here)
appx. 15cm of Fine Flaxcord. (click here)
Paper Trimmer
Scorer
Hot Melt Glue Gun. (click here)
Tape Runner or double sided tape. (click here)
Alphabet stamps (we purchased a set from eBay)
Black ink pad
Scissors
Pencil

INSTRUCTIONS:
Cut a piece of Matt White Card 10.5cm x 21cm. Score and fold in half.
Use your alphabet stamps to stamp “invite” on to the top right of the card. This can be a little fiddly so practise on some paper before you start.
Use your pencil to draw a very light line across your card where you would like your bunting to be. It is nice if this has a slight downwards bow rather than a diagonal straight line.
Take your offcuts of paper and cut bunting shaped triangles. It is good to make an initial template from card and then use this to make sure that all the other shapes you cut are more or less uniform. The top of the bunting shape should be smaller than the 2 sides. For the invitation shown, we have used the following ratios: 2.5cm across the top and 3cm for each side.
Once you have cut enough different triangles, use your double sided tape to stick them in to place along the line you have just drawn. Then use a scissors to cut off any overlap at the sides of the card.
stick your jute cord in to place over the top edge of the triangles by using the hot melt glue gun. Use a scissors to cut off any loose edges at the side.
Print your wording on to the Mint Josie Linen Damask and cut down to size. The finished size should be 9.5cm high x 20cm wide (with the wording set to the middle right of the sheet). Fold in half so that you have a booklet shape and the wording faces you as you open up the booklet.
Use double sided tape to stick your wording inside the invitation

ORDER OF SERVICE
For each Order of Service you will need:1 sheet of Matt white card. (click here)
Small off cuts of paper. (we've used polka pink linen, evelyn linen, josie linen, beatrice linen and mint Josie linen). (click here)
1 sheet of Josie Linen in mint. (click here)
appx. 30cm of Fine Flaxcord. (click here)
Paper Trimmer
Scorer
Hot Melt Glue Gun. (click here)
Tape Runner or double sided tape. (click here)
Alphabet stamps (we purchased a set from eBay)
Black ink pad
Scissors
Pencil
INSTRUCTIONS:
Cut a piece of Matt White Card 14.5cm x 29cm. Score and fold in half.
Use your alphabet stamps to stamp “order of service” on to the top right of the card. This can be a little fiddly so practise on some paper before you start.
Use your pencil to draw a very light line across your card where you would like your bunting to be. As the order of service is larger than the invitation, it looks great if you create a zigzag (going across the card and then back the other way).
Take your offcuts of paper and cut bunting shaped triangles. It is good to make an initial template from card and then use this to make sure that all the other shapes you cut are more or less uniform. The top of the bunting shape should be smaller than the 2 sides. For the order of service shown, we have used the following ratios: 3cm across the top and 3.5cm for each side.
Once you have cut enough different triangles, use your double sided tape to stick them in to place along the lines you have just drawn. Use a scissors to cut off any overlap at the sides of the card.
For this order of service, I worked from the right to left of the card, starting on the bottom line and then working across the top line.
Use the hot melt glue gun to stick your jute cord in to place over the top edge of the triangles. Use a scissors to cut off any loose edges on the left side.
Print your wording on to the Josie Linen Damask and cut down to size. The finished size should be 13.5cm high x 28cm wide (with the wording set in two columns so that you get half on the left side and half on the right side when folded). Fold in half so that you have a booklet shape with the wording on the inside
Use double sided tape to stick your wording inside the invitation.
(If you have lots of wording to go inside your Order of Service Cover, print it on to Matt White Paper, cut it down to size and use a long arm stapler to secure it inside the cover)

FAVOUR BOX
For each Favour Box you will need:
1 White favour box. (click here)
Small off cuts of paper. (we've used polka pink linen, evelyn linen, josie linen, beatrice linen and mint Josie linen). (click here)
Other things you might need:
Tape Runner or double sided tape. (click here)
Scissors
INSTRUCTIONS:
Assemble your favour box.
Take your offcuts of paper and cut bunting shaped triangles that will fit on to the lid of your box. It is good to make an initial template from card and then use this to make sure that all the other shapes you cut are more or less uniform. The top of the bunting shape should be smaller than the 2 sides. For the favour box shown, we have used the following ratios: 2cm across the top and 2.5cm for each side. However, depending on the size of your box and lid, you may need to adjust the size accordingly.
Once you have cut enough different triangles, use your double sided tape to stick them in to place along the top of the box lid. Make sure each side has a line of bunting (at least 3 on each side)
It’s as easy as that!