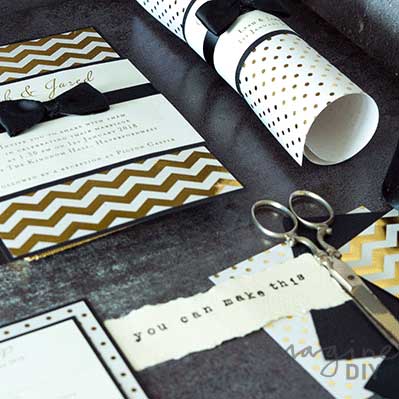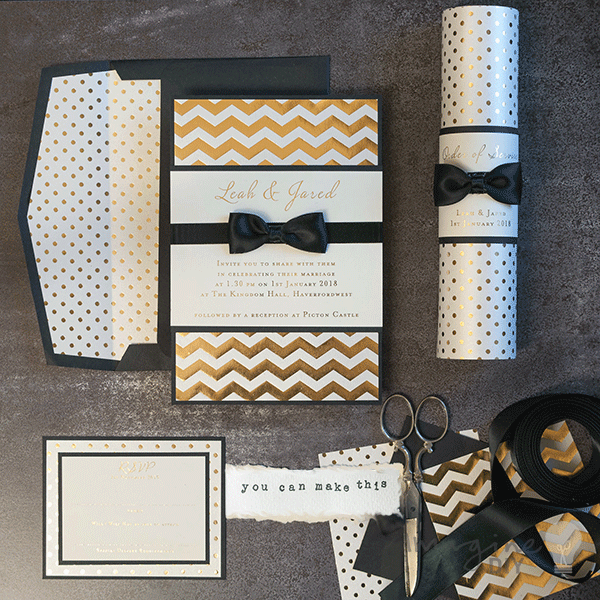
Make Your Own Foiled Tie Wedding Stationery - Perfect for Black Tie Events
Oh My Goodness! I’ve always loved Foiled stationery so imagine how excited I was to find out that I could do it myself without having to buy a really, really expensive foiling machine and equipment.
As soon as we discovered this could be done, we set to work designing a gorgeous range of Black Tie stationery using a gold foil technique. I couldn’t have been more pleased with the results!
Check out our Top Tip on how to Foil at home and you can easily create this gorgeous range of stationery.
Here’s how we made them…….

INVITATION
First, please read the Top Tip on how to Gold Foil at Home (I promise that it’s really easy!) READ HERE
To Make This Invitation You Will Need:
1/2 sheet of Gold chevron lustre paper (click here)
1/6 sheet of black card (click here)
1/3 sheet of matt off white paper (click here)
appx 30cm of 16mm wide black satin ribbon (click here)
appx. 30cm of 25mm wide black satin ribbon (click here)
appx. 5cm of 13mm wide black satin ribbon (click here)
You Might Also Need:
Paper TrimmerTape runner or double sided tape (click here)
Glue Gun (click here)
Instructions:
- Cut a piece of Matt Black Card 18cm x 12.5cm.
- Cut a piece of Chevron Lustre Gold Paper 17.5cm x 12cm. Use your tape runner to stick this on top of the black card, making sure that your borders are even.
- Your wording panel needs to be 12.5cm wide x 9cm high. Make sure you leave a gap of appx 3.5cm for the bow (see image). You will need to print your wording on to an A4 sheet and then cut down to size. You should be able to fit 3 panels on each sheet.
- IF YOU ARE USING THE HOT FOIL TECHNIQUE: Make sure that you print using a Laser Printer. You can then follow the instructions on our Hot Foil Tip to get a lovely shiny metallic finish to your text.
- Cut a piece of matt black card 12.5cm x 9.5cm. Stick this to the front centre of your card using your tape runner.
- Stick your invitation panel on top using your tape runner.
- Use your tape runner to run a line of tape from the front centre of the card (where the ribbon will go) to one of the outside edges. Take one end of your 16mm ribbon and press it on top of the tape from the centre outwards. When you reach the edge of the card, turn the card over, run a line of tape across the back of the card and then continue to press the ribbon in to place. Turn the card over and run the tape across the front so that it joins up with the ribbon you started with. Press the rest of the ribbon in to place and when both ends meet, trim off any excess. You should now have a continuous line of ribbon running around your card.
- Cut a piece of 25mm black satin ribbon appx 13cm long. Us your tape runner to stick one end of the ribbon to the other to form a loop.
- Holding the ribbon join at the back, pinch the loop together at the centre so that it forms a bow shape.
- Use the Glue gun to put a small amount of glue on one end of the 13mm black ribbon. Press this in to place at the back of the bow shape. Whilst still keeping the bow shape, wrap the ribbon around and when it meets at the back, use your glue gun to secure, trimming off any excess. You should now be left with a bow shape.
- Carefully use your glue gun to stick your bow in to place at the front centre of the card on top of the ribbon.
ENVELOPE
To Make This Lined You Will Need:
1/2 sheet of polka lustre paper in gold (click here)
1 envelope
You Might Also Need
Tape runner or double sided tape (click here)
Scissors
Instructions:
- Cut your sheet of Polka Lustre Gold paper in half. Open up your envelope and place it on top of the Lustre paper so that the point of the envelope matches the top of the paper. Take a pencil and draw around the outline of the envelope.
- Take a scissors and cut around the outline you have just drawn. The tricky part is that you need to cut about 0.5cm in from the line you have drawn. This will ensure that your liner is smaller than your envelope and will fit neatly inside.
- When you have finished cutting and you have a piece of polka lustre paper that is slightly smaller than the top part of your envelope, slot the paper inside the envelope so that the glitter is showing. Once you have the paper in the right position, use your tape runner to stick it in to place.

ORDER OF SERVICE SCROLL
First, please read the Top Tip on how to Gold Foil at Home (I promise that it’s really easy!) READ HERE
To Make This Order Of Service Scroll, You Will Need:
1 sheet of polka lustre paper in gold (click here)
1/8 sheet of black card (click here)
1/4 sheet of matt off white paper (click here)
appx 20cm of 16mm wide black satin ribbon (click here)
appx. 20cm of 25mm wide black satin ribbon (click here)
appx. 5cm of 13mm wide black satin ribbon (click here)
Paper Trimmer
Tape runner or double sided tape (click here)
Glue Gun (click here)
Instructions:
- Print your wording on to the Polka Lustre Paper (make sure you print on to the reverse side so that when you roll it, the pattern faces out but the wording is on the inside)
- Your wording panel needs to be appx. 20cm wide x 7cm high. Make sure you leave a gap of appx 3.5cm for the bow (see image). Centre your wording so that you have an even gap each side. You will need to print your wording on to an A4 sheet and then cut down to size. You should be able to fit 4 panels on each sheet.
- IF YOU ARE USING THE HOT FOIL TECHNIQUE: Make sure that you print using a Laser Printer. You can then follow the instructions on our Hot Foil Tip to get a lovely shiny metallic finish to your text.
- Cut a piece of matt black card 20cm x 7.5cm. Using your tape runner, run a line of tape along one of the narrow edges of the strip. Starting at the opposite end, roll the card in to a tube shape. Stick the pre-glued edge on top and use your fingers and thumb to stick firmly in to place. You should now have a secure tube shape (which we will call a Wrap).
- Take your printed panel. Place it face down and run a line of tape along one of the narrow edges. Press the glued edge on top of the black card, matching the joins. Roll the printed panel around the black card wrap until the ends meet. Use your tape runner to stick the loose end in to place at the back of the wrap. You should now have a black border with a white printed panel running around it.
- Place a small amount of glue from the glue gun in the centre of the wording (where the bow will be placed). Take one end of your 16mm ribbon and press it on top of the glue. Feed the ribbon around the wrap and when the ends meet, use the glue gun to secure the loose end. Trim off any excess ribbon.
- Cut a piece of 25mm black satin ribbon appx 13cm long. Us your tape runner to stick one end of the ribbon to the other to form a loop.
- Holding the ribbon join at the back, pinch the loop together at the centre so that it forms a bow shape.
- Use the Glue gun to put a small amount of glue on one end of the 13mm black ribbon. Press this in to place at the back of the bow shape. Whilst still keeping the bow shape, wrap the ribbon around and when it meets at the back, use your glue gun to secure, trimming off any excess. You should now be left with a bow shape.
- Carefully use your glue gun to stick your bow in to place at the front of the order of service wrap.
- Now all you need to do is roll up your previously printed Order of Service Sheet and place it inside the wrap. It helps if you wrap it up small and then release it inside the wrap…..it will expand to fit perfectly.

RSVP
First, please read the Top Tip on how to Gold Foil at Home (I promise that it’s really easy!) READ HERETo Make This RSVP You Will Need:
1/4 sheet of polka lustre paper in gold (click here)
1/8 sheet of black card (click here)
1/4 sheet of matt off white paper (click here)
You Might Also Need:
Paper Trimmer
Tape runner or double sided tape (click here)
Instructions:
- Cut a piece of Matt Black Card 11.5cm x 9cm.
- Cut a piece of Polka Lustre Gold Paper 11cm x 8.5cm. Use your tape runner to stick this on top of the black card, making sure that your borders are even.
- Cut a piece of Matt Black Card 9cm x 6.5cm. Use your tape runner to stick this on top of the Polka Lustre Paper.
- Your wording panel needs to be 8.5cm wide x 6cm high. You will need to print your wording on to an A4 sheet and then cut down to size. You should be able to fit 4 panels on each sheet.
- IF YOU ARE USING THE HOT FOIL TECHNIQUE: Make sure that you print using a Laser Printer. You can then follow the instructions on our Hot Foil Tip to get a lovely shiny metallic finish to your text.
- Stick your RSVP panel on top using your tape runner.