How To Make Glitter Wedding Invitations In A Few Easy Steps
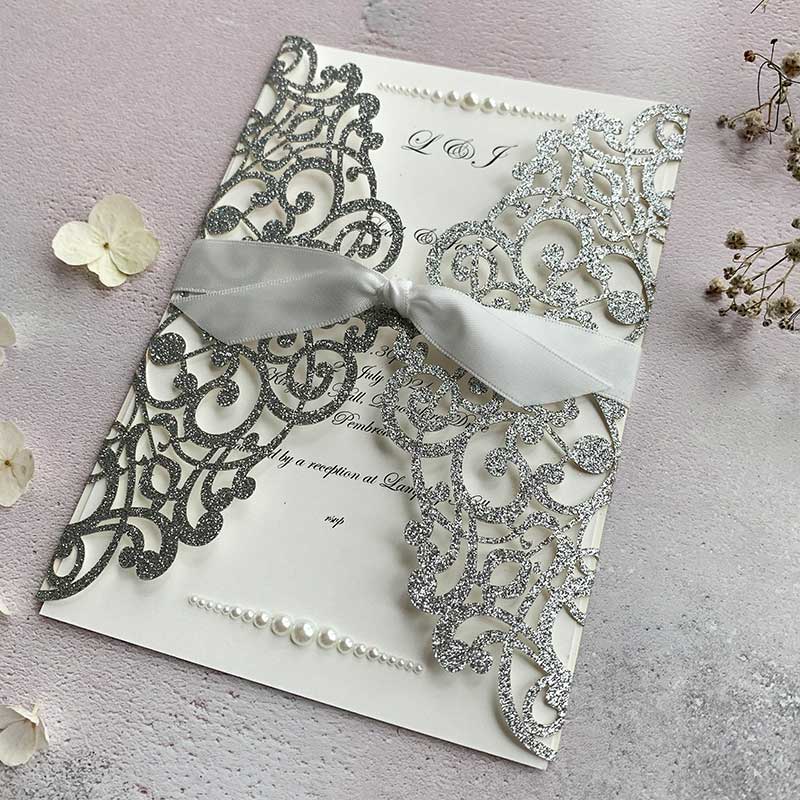
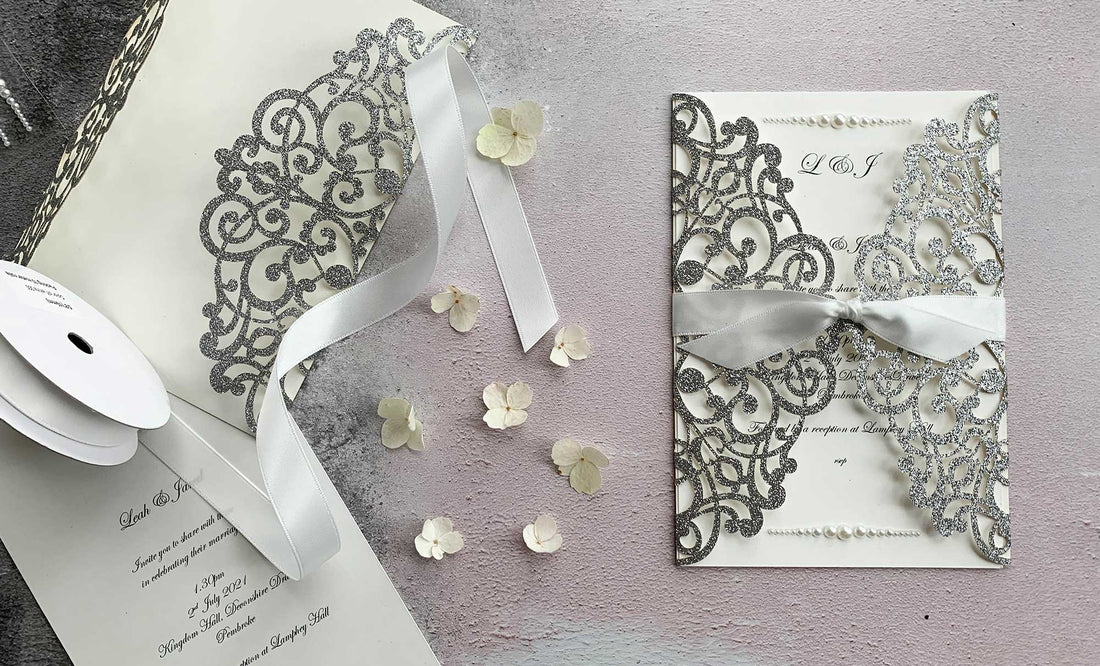
This beautiful design proves that you don't have to be a talented crafter to create stunning results. If you love a bit of sparkle, this is the perfect invitation for you. In just a few minutes, and a few easy steps, you can recreate this stunning invitation at home.
For this design, I've used the Lavish Laser cut Invitation in Silver Glitter Although I've only added an invitation panel, you can add as many extra inserts as you'd like. Just print them and tuck them in behind the main invitation. The Lavish Laser Cut Invitation is available in alternative colours. So you can easily customise this design.
Your guests are going to love these.
For Each Invitation You Will Need:
1 x Lavish Laser Cut in Silver Glitter. (click here)
1 Matt Off White Insert. (click here)
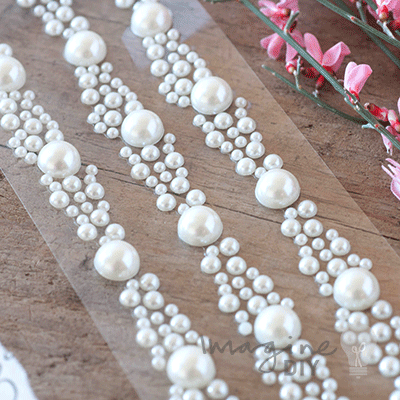
2 x Rows of Horizon Pearl Self Adhesive Stickers (1 pack will make 5 invitations). (click here)
Appx 40cm of 16mm Ivory Satin Ribbon. (click here)
Also:
Envelope. (click here)
Scissors
If you’re not big on reading instructions, we’ve put together a video to show you how it’s done. (just press play)……
I used the Font Edwardian Script.
So Here Are The Instructions……

PRINTING
- Download the following template:
INVITATION WORDING
Type your wording in the spaces provided. Make sure you check that the spelling, grammar and layout are all correct. You will also need to check that the times, dates and locations are all included. I've used the font Edwardian Script. - The insert size should be 17.5cm x 12cm. If you are using one of our pre-cut inserts, you should be able to print directly onto it.
However, if you choose to use A4 card, you will need to cut it down to this size. - Print your wording onto the inserts.
ASSEMBLING
- Peel off a row of Horizon Pearl Stickers. Carefully press into place at the top centre of the invitation panel. Once you are happy with the position, press it firmly into place. It should be appx. 1cm from the top of the card.
- Repeat this process at the bottom of the invitation panel.
- Place the invitation inside the silver glitter laser cut.
- Cut a piece of ribbon appx. 40cm. Lay it onto a flat surface and place the invitation on top so that it sits in the centre of the ribbon.
- Wrap both ends of the ribbon in to the front centre of the invitation and tie a knot. Holding the knot in place with one of your fingers, tie a second knot over the top of the first knot to form a double knot.
- Pull the knots tight and then tease the ribbon into shape so that it sits nicely on the card.
- Use a scissors to trim the excess ribbon. Trim at an angle for a nice finish.