Make Lace Wedding Stationery With Pearls
For each Invitation You Will Need:
1 and 1/2 sheet of Pearlised Cream A4 Card (click here)
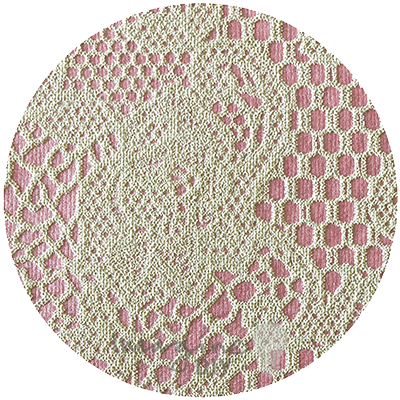
1/2 sheet of Chantilly Embossed paper in Rose Pink and Cream (click here)
1/2 sheet of Pink Recycled Paper (click here)
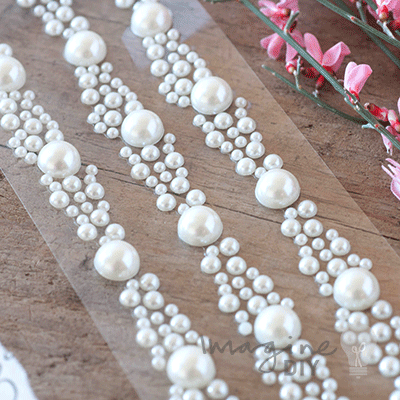
1 Row of Venice Pearl Self Adhesive Stickers (click here)
Paper Trimmer
High Tack Tape (click here)
Mini Mounting Pads or foam pads (optional)
Create your own romantic wedding stationery by combining beautifully textured lace with sumptuous pearls. To inspire you, we've designed this gorgeous range in dusky pink and cream. By changing the paper or swapping the pearls for crystals, you can create something that fits your wedding perfectly. Using self adhesive pearls or crystals allows you to add fabulous details with the minimum of fuss.
Why not give it a go?
So Here Are The Instructions……

You’ll also need to download this template…..
Instructions
- Cut your card and paper up as follows:
Pearlised Cream Card - 13cm x 19cm and
8.5cm x 14.5cm and
9cm x 15cm
Chantilly Embossed Paper - 13cm x 19cm
Pink Recycled Paper - 9cm x 15cm - Print your wording on to the smallest panel of Cream Card (8.5cm x 14cm). Make sure you leave a gap large enough for the pearl decoration.
- Peel off a row of Venice Self Adhesive Pearls. Starting at one edge of the insert, place the row carefully into place along the panel so that it sits straight. This can be a little tricky but if you're light handed don't press it in to place until you are ready, you should be able to reposition it if you are not happy. Once you are happy, you can stick the pearls firmly into place by pressing along them with one of your fingers or thumb.
- Use your high tack tape to stick the Pink Recycled Paper on to the middle sized cream card panel. You will not be able to see the cream card once you have done this. However, the cream card will add extra strength to the paper.
- Use your tape runner to stick the invitation panel on top of the Pink recycled paper.
- Use your tape runner to stick the Chantilly embossed paper on to the largest panel of Cream Card.
- Peel off about 15 mini mounting pads and place them evenly along the back of the invitation panel (which should already be mounted on to the pink panel). You will need about 15 mini mounting pads to give a good coverage. Peel off the backing of the mini mounting pads and press the panel in to place on top of the Chantilly embossed paper
NOTE - If you are not using mini mounting pads, you can use high tack tape instead.

FAVOUR BOX

You Will Need:
1 x Favour box (click here)
1/2 sheet of Pink Recycled Paper (click here)
1 x Dusky Pink Cameo (click here)
22cm of Joy Lace Nude (click here)
You Will Also Need:
High Tack Tape (click here)
Hit Melt Glue Gun (click here)
Plus a sharp scissors
Instructions:
For this pretty wedding favour, we have wrapped one of our lovely little favour boxes. However, you could wrap almost anything in the same way as long as it was small enough to fit the paper. If you're using a small box, please remember to fill it before you start!!
Basically, if you know how to wrap a parcel, this will be a doddle for you.
- Measure your box and cut a piece of pink recycled paper that is about 1cm larger than double the width and is long enough to wrap all the way around your box.
- Place your box top down in the centre of the paper. Run a line of tape along one edge of the paper and wrap around until it covers the box and the paper is stuck together along one edge.
- Turn the box to one of the sides that is currently open. Pull the bottom of the paper up towards the top of the box and hold in place. Fold in each side of the paper until it touches the box. Make a crease along the paper so that you have a point that can be folded down and stuck in to place.
Repeat this process on the other open end. - Cut a length of Joy Lace long enough to wrap around the box. Use your glue gun to stick one end of the lace to the bottom of the box (in the middle). Wrap the lace around and when you get back to the bottom, glue the loose end in to place.
- Use your glue gun to stick the Cameo embellishment in to place on top of the ribbon.