Make Champagne Lace Wedding Stationery with these step by step instructions.
Our Chantilly Lace Paper has been a popular choice for Champagne Lace Wedding Stationery since it’s launch. When we received the delivery of new colours, I was really excited to start work designing with them.
This beautiful range is easy to recreate at home.
Here’s how we made this range:

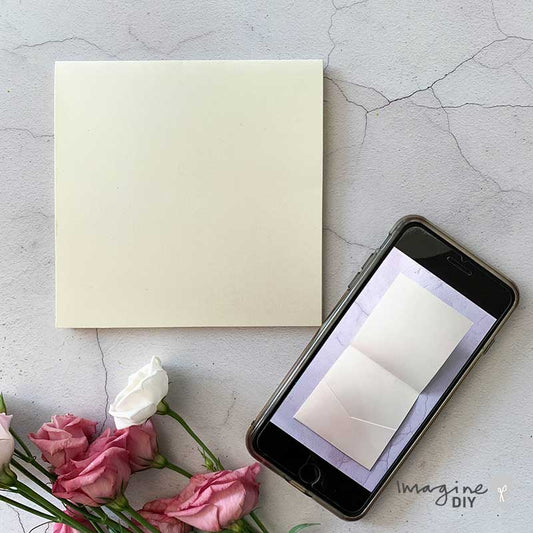
POCKET INVITATION
You Will Need:
1 x Pearlised Ivory Booklet Pocket Invitation (click here)1 sheet of Chantilly lace paper in champagne (click here)
3 sheets of A4 paper in bisque (click here)
1/2 sheet of A4 card in pearlised ivory (click here)
1 Ivory Dior Bow (click here)
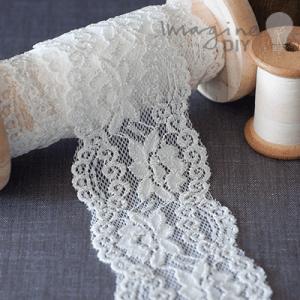
20cm of elegance lace (click here)
1 Emma Rose Gold (click here)
Other Things You Might Need:
Paper trimmer
Tape Runner or double sided tape (click here)
Glue gun (click here)

INSTRUCTIONS
FRONT
- Firstly cut a piece of Bisque Paper 14cm x 14cm and stick to the front of the pocket using double sided tape or a tape runner. Make sure that the borders are even.
- Secondly cut a piece of Chantilly Lace Paper 13.5cm x 13.5cm. Stick on top of the Bisque Paper.
- Run a line of double sided tape across the front centre of your card (across the middle of the chantilly lace paper). Press the lace in to place on top of the double sided tape making sure that you have a roughly equal overlap on both sides.
- Fold the overlapping lace to the inside of the card and secure in place using a small amount of glue from the glue gun.
- Put a small dab of glue on the back of the Dior Bow. Press in to place in the middle of the lace at the front of the card. Fold the loose edges around to the inside of the card and secure in place using a small amount of glue from the glue gun.
- The last step is using the glue gun to stick the embellishment in to place in the centre of the Bow
INSIDE
- For the inside cut at first a piece of Bisque Paper 14cm x 14cm and stick to the inside flap of the card using double sided tape or a tape runner. To make sure that the card holds on to the lace and ribbon, it helps to add a tiny amount of glue from the glue gun on top of the fabric.
- Secondly cut a piece of Chantilly Lace Paper 13.5cm x 13.5cm. Then stick it on top of the Bisque Paper.
- After that cut a piece of Bisque Paper 10.5cm x 10.5cm and stick on top of the Chantilly Lace Paper, making sure that your borders are even.
- Lastly print your wording on to a piece of Bisque paper and cut to size. The finished size should be appx. 10cm x 10cm. Stick the printed panel on top of the Bisque Card.
INSERTS
- Print your inserts on to the card and cut to size as follows:
BISQUE PAPER
(tip ... for added sturdiness, you could back this onto a pearlised ivory card)..
Large Insert - 14cm x 14cm
RSVP - 11.5cm x 9cm
PEARLISED IVORY CARD
Medium Insert - 14cm x 12cm
2. Slot the inserts inside the pocket.

SAVE THE DATE CARD
Here’s What You Need:You Will Need:
1/12 sheet of Chantilly lace paper in champagne (click here)
1/2 sheets of A4 paper in bisque (click here)
1/4 sheet of A4 card in pearlised ivory (click here)
1 Ivory Single Dior Bow (click here)
1 Emma Rose Gold (click here)
Other Things You Might Need:
Paper trimmer
Tape Runner or double sided tape (click here)
Glue gun (click here)
INSTRUCTIONS
- First of all cut a piece of Bisque Paper 14.5cm x 10.5cm.
- Cut a piece of pearlised ivory card 14.5cm x 10.5cm.
- stick the bisque paper on top of the ivory card making sure to line up the edges (use double sided tape or a tape runner)
- Secondly print your wording on to Pearlised Ivory Card and cut to size. The finished size should be 14cm x 10cm. Make sure you leave a gap of appx. 6cm at the top of the first line of text.
- Then cut a piece of Chatilly Lace Paper 10cm x 5cm. Use double sided tape to stick this in to place at the top of the invitation panel.
- Put a small dab of glue on the back of the Dior Bow. Press it in to place in the middle of the insert where the lace paper meets the printed panel. Fold the loose edges of the ribbon around to the back of the card and secure in place using a small amount of glue from the glue gun.
- Use double sided tape to stick the invitation panel on top of the bisque card. To make sure that the card holds on to the ribbon, it helps to add a tiny amount of glue from the glue gun on top of the fabric.
- Use the glue gun to stick the embellishment to the centre of the bow.

ORDER OF SERVICE
Here’s What You Need:
1/2 sheet of Chantilly lace paper in champagne (click here)
1 1/2 sheets of A4 paper in bisque (click here)
1/20 sheet of A4 paper in pearlised ivory (plus additional sheets for inside wording) (click here)
1 Ivory Dior Bow (click here)
32cm of elegance lace (click here)
1 Emma Rose Gold (click here)
Other Things You Might Need:
Paper trimmer
Scorer
Tape Runner or double sided tape (click here)
Glue gun (click here)
Long arm stapler
INSTRUCTIONS
- Cut your Pearlised Ivory Card to 21cm x 28cm. Score and fold in half.
- Cut a piece of Bisque Paper 20cm x 13cm.
- Cut a piece of Chantilly Lace Paper 19.5cm x 12.5cm. Use double sided tape to stick this on top of the Bisque oaoer.
- Run a line of double sided tape across the front centre of the panel (across the middle of the chantilly lace paper). Press the lace in to place on top of the double sided tape making sure that you have a roughly equal overlap on both sides.
- Fold the overlapping lace to the back of the panel and secure in place using a small amount of glue from the glue gun.
- Put a small dab of glue on the back of the Dior Bow. Press in to place in the middle of the lace at the front of the panel. Fold the loose edges around to the back of the card and secure in place using a small amount of glue from the glue gun.
- Use the glue gun to stick the embellishment in to place in the center of the Bow.
- Print your order of service panel on to Pearlised Ivory Paper and cut to size. The finished size should be appx. 7cm x 2.5cm.
- Cut a piece of Bisque Card 7.5cm x 3cm. Stick this to the bottom centre of the panel (see image)
- Use double sided tape to stick the Order of Service Panel on top.
- Stick your panel on to the front of your order of service using double sided tape or a tape runner. To make sure that the card holds on to the lace and ribbon, it helps to add a tiny amount of glue from the glue gun on top of the fabric.
- Print your Order of service on to A4 paper and cut to size. The finished size should be 20cm high and 27cm wide. Fold in half.
- Place the insert inside the cover and use the stapler to secure in to place along the creased edge.

PLACE CARD
1/8 sheet of Chantilly lace paper in champagne (click here)1/8 sheets of A4 paper in bisque (click here)
1/4 sheet of A4 card in pearlised ivory (click here)
1/20 sheet of A4 paper in pearlised ivory (click here)
1 Emma Rose Gold (click here)
Other Things You Might Need:
Paper trimmer
Scorer
Tape Runner or double sided tape (click here)
Glue gun (click here)
INSTRUCTIONS
- Cut a piece of Pearlised Ivory Card 14cm x 9cm. Score and fold in half.
- Cut a piece of Bisque paper 8.5cm x 6.5cm. Use your double sided tape or tape runner to stick to the front of the place card (making sure the borders are even).
- Cut a piece of Chantilly Lace Paper 8cm x 6cm. Stick on top of the Bisque paper.
- Cut a piece of Bisque paper 5cm x 3cm. Stick on top of the Chantilly Lace Paper.
- Cut a piece of Pearlised Ivory Paper 4.5cm x 2.5cm. Stick on top of the Bisque paper.
- Use your glue gun to stick the Emma embellishment in to place at the top centre of the central name panel (see image)
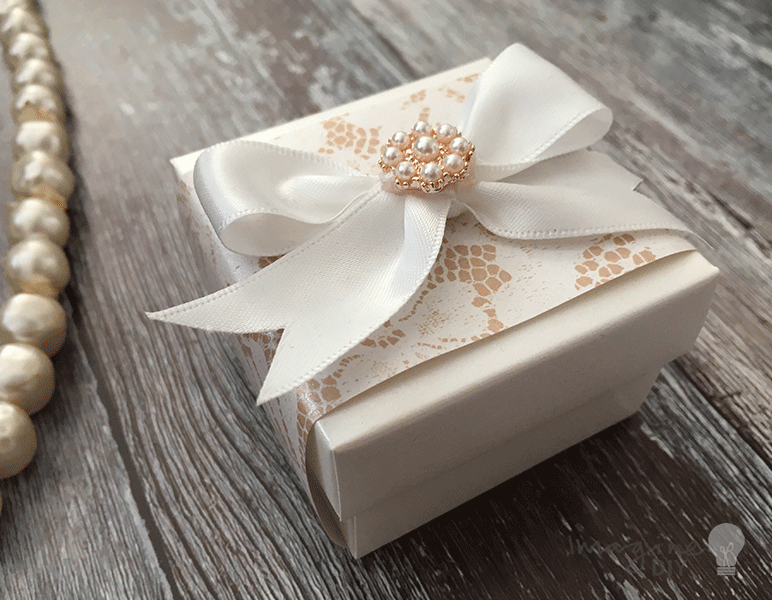
FAVOUR BOX
Here’s What You Need:Pearlised Ivory Favour Box (click here)
1/5 sheet of Chantilly lace paper in champagne (click here)
20cm of 19mm Ivory Satin Ribbon (click here)
1 Emma Rose Gold (click here)
You will also need:
Paper trimmer
Glue gun (click here)
INSTRUCTIONS
- Assemble the base and lid of your favour box.
- Cut a piece of Chantilly Lace Paper 21cm x 5cm. Wrap the paper around the favour box, securing the ends together at the bottom of the box using your glue gun.
- Tie a neat bow with your ribbon. Cut the ends into an inverted “v” shape.
- Use the glue gun to stick your bow on to the top of the box (in the centre of the lace paper)
- Use your glue gun to stick the embellishment in to place on top of the bow.