Make Rustic Polka Dot Wedding Stationery
We never tire of polka dots. This gorgeous new design gives a really rustic edge to a classic design. It's not too difficult to make yourself so why not give it a go?
As with all our designs, if the colours or pattern just aren't right for you, just choose a different ribbon, backing paper etc. With a few tweaks, you can make this design 100% perfect for you.
Why not give it a go?
So Here Are The Instructions……

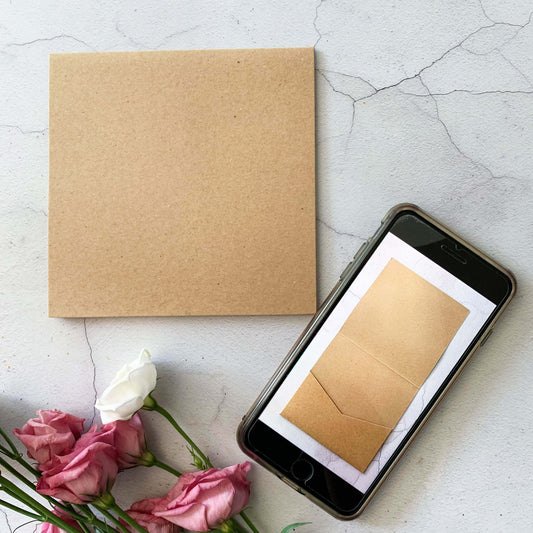
POCKET INVITATION
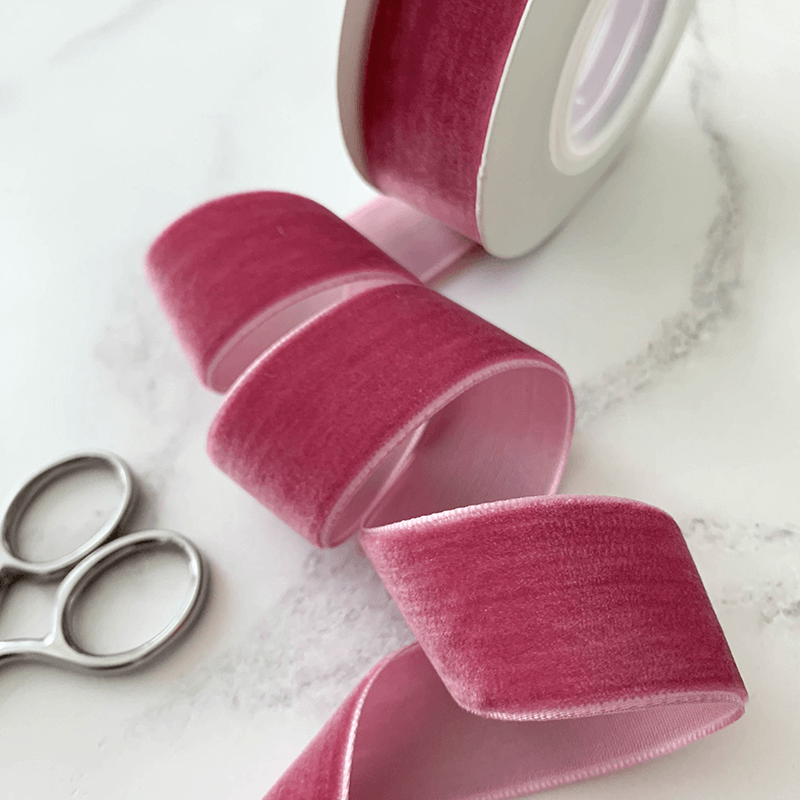
You Will Need:
1 x Booklet Pocket Invitation in Kraft (click here)
appx. 60cm of Red Velvet Polka Dot Ribbon (click here)
1 sheet of Polka Paper in Kraft (click here)
2 sheets of Kraft Card (click here)
2 sheets of Kraft Paper (click here)
You Will Also Need:
Paper Trimmer
Corner Chomper (corner punch)
Tape Runner or Double Sided Tape (click here)
Hot Melt Glue Gun (click here)
Mini Mounting Pads (or foam pads)
A sharp scissors
Instructions

Front.......
Before you start, it is useful to make templates for your front tags. You will need 2 different templates. So make these:
- Cut a piece of paper 11cm x 6cm. Fold in half lengthways and with the paper folded, use a scissors to cut off the top corner (3.5cm from the top). When you open the paper, it should leave you with a tag shape. You can use this as your larger template.
- Cut a piece of paper 10.5cm x 5.5cm. Fold in half lengthways and with the paper folded, use a scissors to cut off the top corner (3.5cm from the top). When you open the paper, it should leave you with a tag shape that is ever so slightly smaller than the one you just made. You can use this as your smaller template.
- Firstly print your front tag wording on to A4 Kraft Paper and cut down to size. The finished size should be 10.5cm x 5.5cm with the wording set to the right. Hold your smaller template on top and use a scissors to cut your tag shape.
Once you have a tag shape, use your corner chomper on the 2 corners of your tag to create rounded edges. - Cut a piece of Kraft Kard 11cm x 6cm. Hold your large template on top and use a scissors to cut your tag shape. Once you have a tag shape, use your corner chomper on the 2 corners of your tag to create rounded edges.
- Use your tape runner to stick the printed panel on to the larger tag.
- Peel off some mini mounting pads and stick them around the edges of your tag (and a few across the middle). Make sure you distribute them evenly (appx. 1.5cm apart). Stick the tag to the front of the card so that it runs diagonally as shown in the picture.
- Tie a bow with the Red Velvet Polka Dot Ribbon. You will need to tease the bow into shape. Once you are happy with the size and shape of the bow, use your glue gun to stick it in to place at the top left of your card, covering the top of the tag.

- Print your wording on to Kraft A4 paper and cut down to size. The finished size should be 10.5cm x 10.5cm. We have used the font "MY UNDERWOOD"
- Cut a piece of Polka Paper in Kraft 14cm x 14cm. Use your double sided tape to stick this in to place on the inside panel of the pocket invitation.
- Cut a piece of Kraft Card 11cm x 11cm. Stick this on top of the polka paper using your double sided tape. Make sure that you place it centrally (so that each border is equal)
- Stick your printed invitation panel on top of the Kraft Card.
LARGE INSERT
- Print your wording on to Kraft A4 paper and cut down to size. The finished size should be 13.5cm x 13.5cm.
- Cut a piece of Kraft A4 Card 14cm x 14cm. Use double sided tape to stick the printed panel on top.
MEDIUM INSERT
- Print your wording on to Polka Kraft Paper and cut down to size. The finished size should be 14cm x 11.5cm.
- Cut a piece of Kraft A4 Card 14cm x 11.5cm. Use double sided tape to stick the printed panel on top.
RSVP
- Print your wording on to Kraft A4 Paper and cut down to size. The finished size should be 11cm x 8.5cm.
- Cut a piece of Kraft A4 Card 11.5cm x 9cm. Use double sided tape to stick the printed panel on top.