Make Your Own Luxury Glitter Pocket Invitations
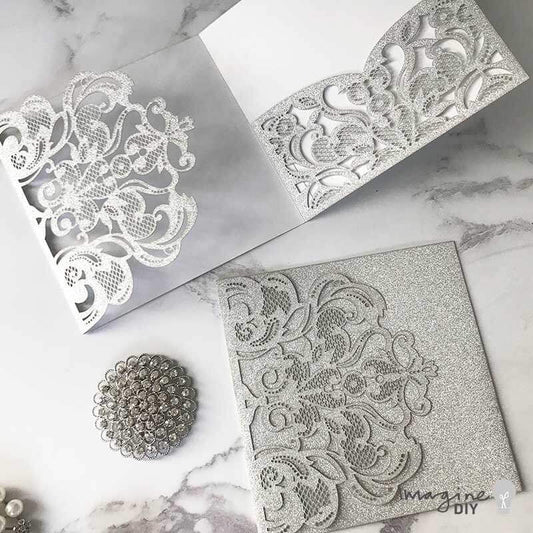
If you're a bride that loves bling, these elegant glitter laser cut invitations are the perfect choice. Our Rococo Glitter Laser Cut Pocketfolds are striking, elegant and full of the sparkle we love.
Because the design on this pocketfold is so striking, I've opted to keep it simple, letting the design do all the work for us. I've just added a pop of contrasting nude pink glitter to make it pop a little.
Finishing this invitation almost made me wish I was getting married again!
This design is really easy to make so even if you're an amateur crafter, you'll be able to get really good results using the design guides we've provided.
For Each Invitation You Will Need:
1 x Pocketfold Rococo Wedding Invitation in Silver Glitter (click here)
2 sheets of Matt White A4 Card (click here)
1 sheet of Silver Glitter Card (click here)
1 sheet of Nude Glitter Card (click here)
Also:
PaperTrimmer (you only need one of these!)
High Tack Double Sided Tape (click here)
You might also want to consider a matching Silver Glitter Envelope (click here)
TIP 1 – Change the glitter card or invitation colour to coordinate with your theme.
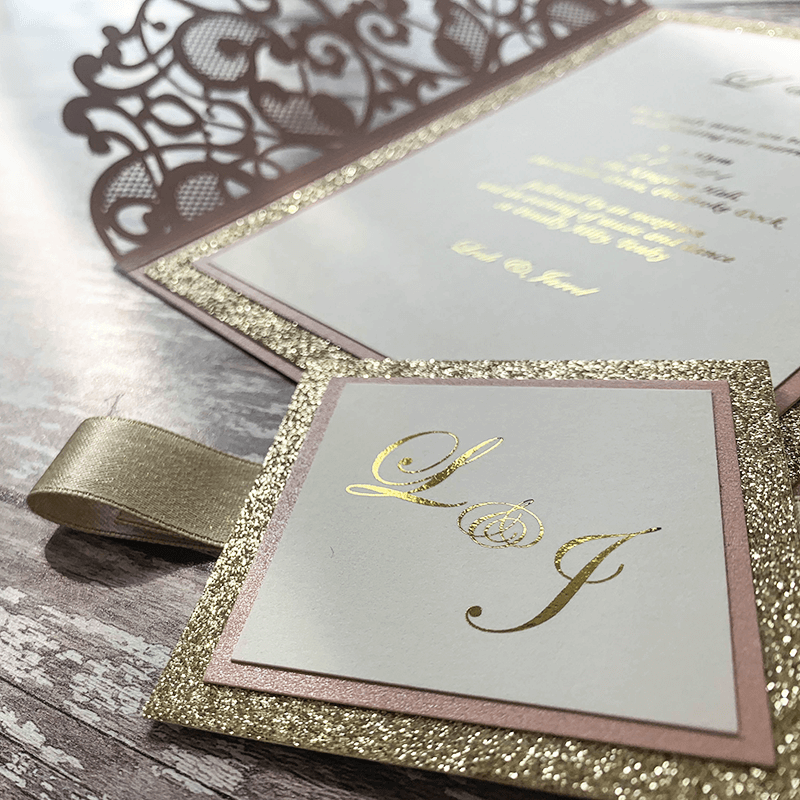
TIP 2 - For extra bling, add an embellishment or some ribbon to the outside.
If you’re not big on reading instructions, we’ve put together a quick video to show you how it’s done (just press play)……
You’ll also need to download these templates…..
INVITATION AND ADDITIONAL INFORMATION
GUEST INFORMATION AND RSVP CARD
We used the following fonts:
Edwardian Script and Copperplate Gothic Light
So Here Are The Instructions……


Instructions
- Download the INVITATION AND ADDITIONAL INFORMATION and GUEST INFORMATION AND RSVP CARD. Type your wording in the printable areas. (We used the following fonts……..Edwardian Script and Century Gothic Light).
Print onto the Matt White Card
Use your paper trimmer to cut the inserts down to size using the guides provided. (you don’t need to cut exactly on the black line…..a few mm’s inside will be fine). The finished sizes should be: INVITATION - 12cm x 12cm GUEST INFORMATION - 13.5cm x 13.5cm ADDITIONAL INFORMATION - 13.5cm x 11.5cm RSVP CARD - 13cm x 9cm - Use your paper trimmer to cut the Silver Glitter Card to the following sizes:
14.3cm x 14.3cm
14cm x 14cm
also, if you would like a tiny strip to stick to the top of the RSVP card, you can cut on that's 13cm wide but just a few mm's thick. - Use your paper trimmer to cut the Nude Glitter Card to the following sizes:
13cm x 13cm 14cm x 12cm - Use the high tack tape to stick the large silver glitter panel to the inside of the invitation (make sure you stick tape along each side and across the middle)
- Stick the Large Nude Glitter card panel on top of the silver glitter card (as above). Make sure that your borders are even.
- Stick the printed invitation on top.
- Use high tack tape to stick the printed guest information sheet onto the 14cm x 14cm silver glitter card panel. Place this inside the pocket.
- Use high tack tape to stick the printed additional information sheet onto the nude glitter card panel. Place this inside the pocket.
- Place the RSVP card inside the pocket.
And you're done! You've got a beautiful invitation ready to send to one of your special guests. They are going to love it!!!